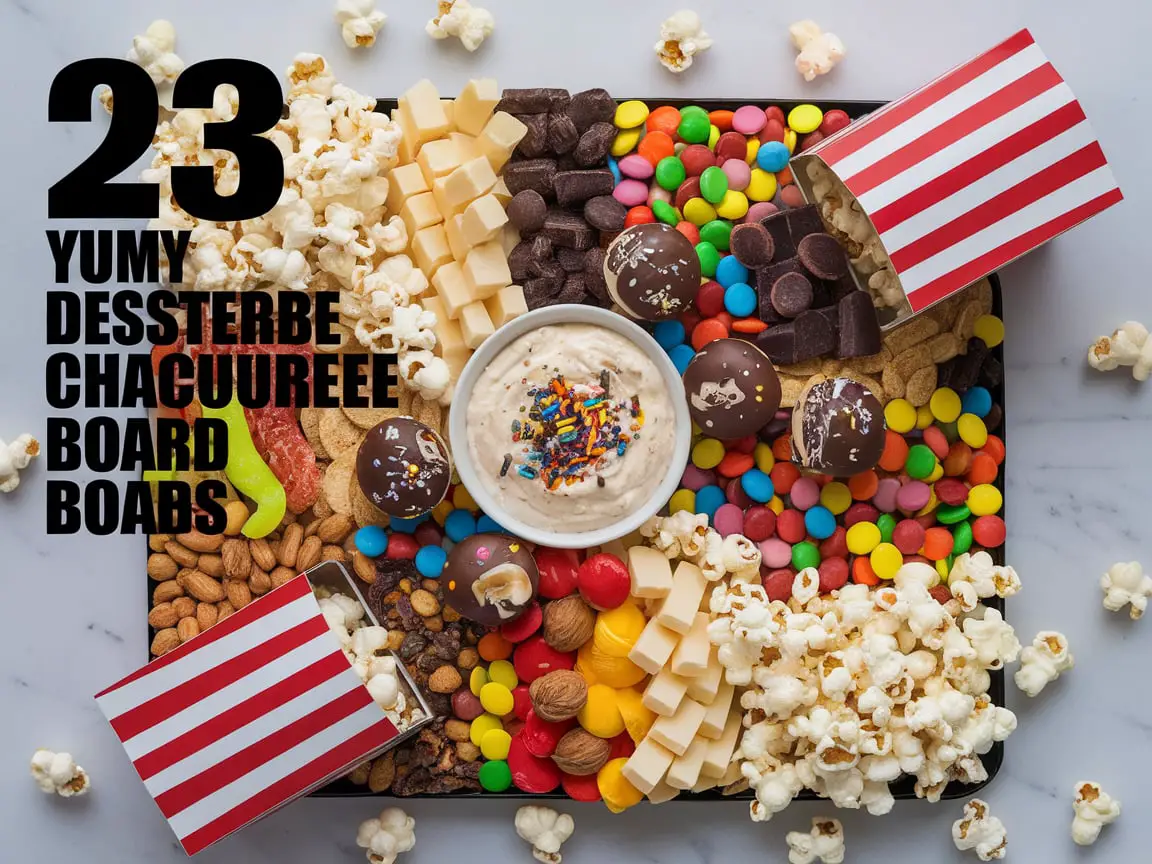
23 Delicious Dessert Charcuterie Board Ideas You’ll Love
Looking to sweeten up your next gathering? Dessert charcuterie boards are a fun and creative way to impress your guests with a delightful mix of treats. From decadent chocolates to fresh fruits and everything in between, we’ve got 23 dessert board ideas that will spark your imagination and satisfy any sweet tooth. Dive in and get inspired!
Fruit Tartlets Galore
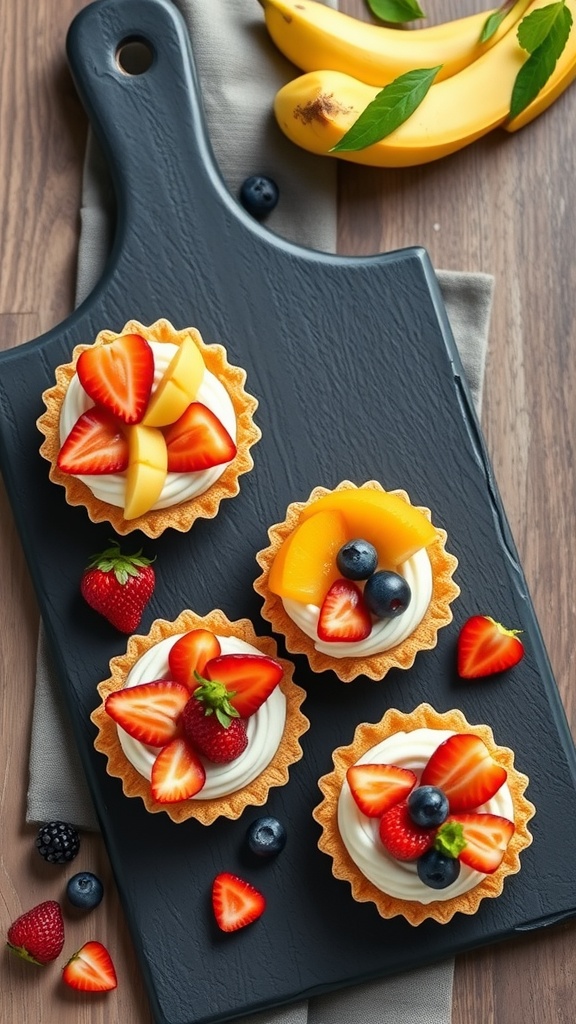
Fruit tartlets are a delightful addition to any dessert charcuterie board, combining flaky pastry with creamy filling and vibrant fruits. These little treats are not only visually appealing but also offer a burst of flavor with every bite. Perfect for movie night snacks, they are simple enough to whip up and impressive enough to wow your guests.
The balance of sweet, creamy, and fruity elements makes these tartlets a favorite at any gathering or as a sweet treat at home. They pair wonderfully with a variety of other snacks on a charcuterie party board, and are a great way to bring a colorful touch to your dessert spread!
Ingredients
- 1 package of pre-made tartlet shells
- 1 cup heavy whipping cream
- 2 tablespoons powdered sugar
- 1 teaspoon vanilla extract
- 1 cup assorted fresh fruits (strawberries, blueberries, peaches, etc.)
- Optional: fruit glaze or jam for shine
Instructions
- Prepare the Filling: In a mixing bowl, whip the heavy cream with powdered sugar and vanilla extract until soft peaks form.
- Fill the Tartlets: Spoon or pipe the whipped cream into each tartlet shell until generously filled.
- Top with Fruit: Arrange the fresh fruits on top of the whipped cream in an artistic fashion.
- Glaze (Optional): If desired, brush the tops with fruit glaze for added shine and sweetness.
- Chill: Refrigerate the tartlets for about 30 minutes before serving to allow the cream to set.
Chocolate-Covered Strawberries
Chocolate-covered strawberries are a delightful treat that brings together the sweetness of fresh strawberries and rich, melted chocolate. They are easy to make and perfect for any occasion, whether it’s a cozy movie night or a charcuterie party. The combination of juicy, tart strawberries with smooth chocolate creates a delicious contrast that’s hard to resist.
These treats can be made in a variety of ways, allowing you to get creative with toppings or chocolate types. They work brilliantly as part of a movie night charcuterie board or as a sweet snack on their own. Let’s dive into how you can whip up this simple and tasty dessert!
Ingredients
- 1 pound fresh strawberries
- 8 ounces semi-sweet chocolate chips
- 4 ounces white chocolate chips (optional)
- 1 tablespoon coconut oil (optional, for smoother chocolate)
- Sprinkles or crushed nuts (optional, for decoration)
Instructions
- Prepare the Strawberries: Wash the strawberries thoroughly and pat them dry with a paper towel. Ensure they are completely dry to help the chocolate adhere.
- Melt the Chocolate: In a microwave-safe bowl, combine the semi-sweet chocolate chips and coconut oil (if using). Microwave in 30-second intervals, stirring in between, until melted and smooth.
- Dip the Strawberries: Hold each strawberry by the stem and dip it into the melted chocolate, allowing any excess to drip off. Place the dipped strawberry on a baking sheet lined with parchment paper.
- Add Decorations: If desired, melt the white chocolate in the same way as the semi-sweet chocolate, and drizzle it over the chocolate-covered strawberries. You can also add sprinkles or crushed nuts at this stage.
- Chill: Place the baking sheet in the refrigerator for about 30 minutes or until the chocolate is set. Serve them as a part of your snack boards or enjoy them on their own!
Mini Cupcake Collection
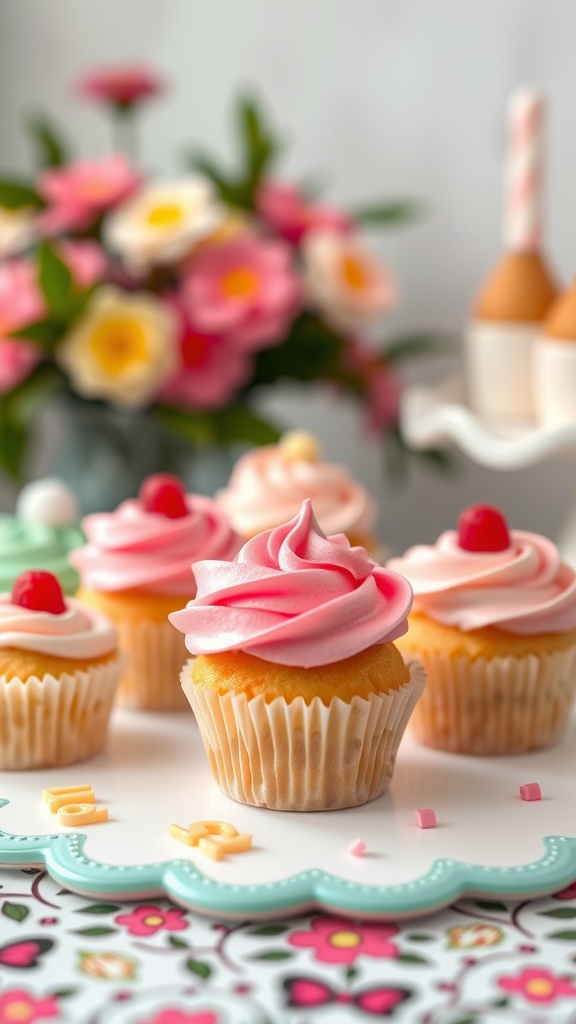
Mini cupcakes are delightful little treats that bring a touch of sweetness to any gathering. These bite-sized desserts are perfect for a charcuterie board, especially for movie night snacks or a charcuterie party. With their soft texture and rich flavors, mini cupcakes are not only fun to eat but also incredibly easy to make, making them a go-to option for any occasion.
To assemble your mini cupcake collection, consider mixing different flavors and colors. Vanilla, chocolate, and red velvet are classic choices that everyone loves. Top them with swirls of buttercream, sprinkles, or a cherry for a cheerful finish. They’re an irresistible addition to your movie night charcuterie board, sure to please guests of all ages!
Ingredients
- 1 ½ cups all-purpose flour
- 1 cup granulated sugar
- ½ cup unsalted butter, softened
- 2 large eggs
- 1 tsp vanilla extract
- 1 tsp baking powder
- ½ tsp baking soda
- ½ tsp salt
- ½ cup milk
- 2 cups buttercream frosting (various colors)
- Cherry candies or sprinkles for topping
Instructions
- Preheat the oven to 350°F (175°C) and line a mini cupcake pan with liners.
- In a large bowl, cream together the softened butter and sugar until light and fluffy. Add the eggs one at a time, mixing well after each addition.
- Stir in the vanilla extract, baking powder, baking soda, and salt. Gradually mix in the flour, alternating with the milk until just combined.
- Fill each cupcake liner about two-thirds full with batter. Bake for 12-15 minutes or until a toothpick inserted into the center comes out clean.
- Let the cupcakes cool completely before frosting. Use a piping bag to swirl buttercream on top, and finish with a cherry or sprinkles for decoration.
Macaron Medley
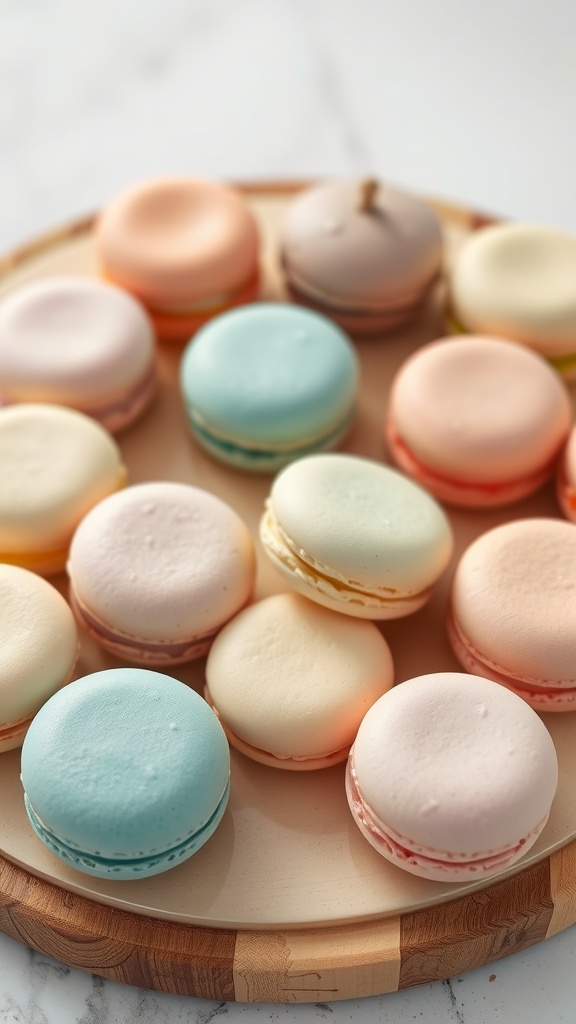
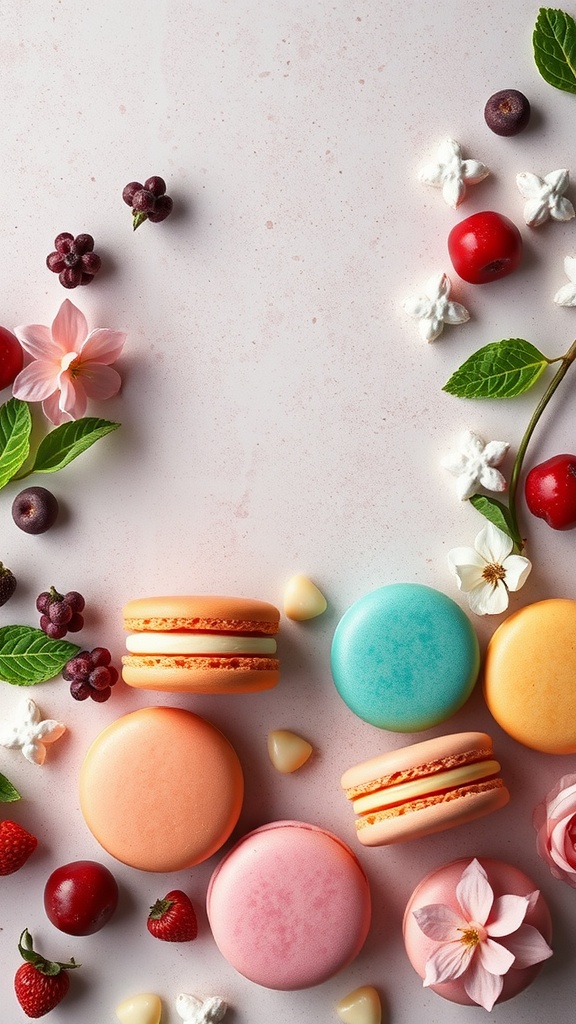
Macarons are delightful French treats that bring a touch of elegance to any dessert charcuterie board. With their crisp exterior and soft, chewy center, these colorful confections can be filled with a variety of flavors, from classic vanilla to rich chocolate or fruity raspberry. Making macarons may seem intimidating at first, but with a bit of practice, you’ll find they’re quite simple!
These delicate cookies are perfect for any occasion, whether you’re hosting a charcuterie party or preparing snacks for movie night. Their vibrant colors and flavors create an eye-catching display that’s just as fun to eat as it is to look at. So, get ready to impress your guests with a delectable macaron medley!
Ingredients
- 1 cup almond flour
- 1 3/4 cup powdered sugar
- 3 large egg whites, at room temperature
- 1/4 cup granulated sugar
- 1 teaspoon vanilla extract
- Food coloring (optional)
- 1 cup butter, softened
- 2 cups powdered sugar (for filling)
- 1/4 cup flavoring (like fruit puree or chocolate)
Instructions
- Prepare the Macaron Batter: Sift together almond flour and powdered sugar in a bowl. In a separate bowl, whip the egg whites until foamy, then gradually add the granulated sugar, continuing to whip until stiff peaks form. Gently fold the dry ingredients into the egg whites, adding food coloring if desired.
- Pipe the Macarons: Transfer the batter to a piping bag and pipe small circles onto a baking sheet lined with parchment paper. Let them sit for about 30 minutes to form a skin.
- Bake the Macarons: Preheat the oven to 300°F (150°C) and bake the macarons for about 15-20 minutes. Allow them to cool completely on the baking sheet.
- Make the Filling: Beat the softened butter until creamy, then gradually add powdered sugar and your chosen flavoring, mixing until smooth.
- Assemble the Macarons: Pair up the cooled shells and spread or pipe the filling on one shell of each pair, then top with the other shell. Store in an airtight container in the fridge for up to a week.
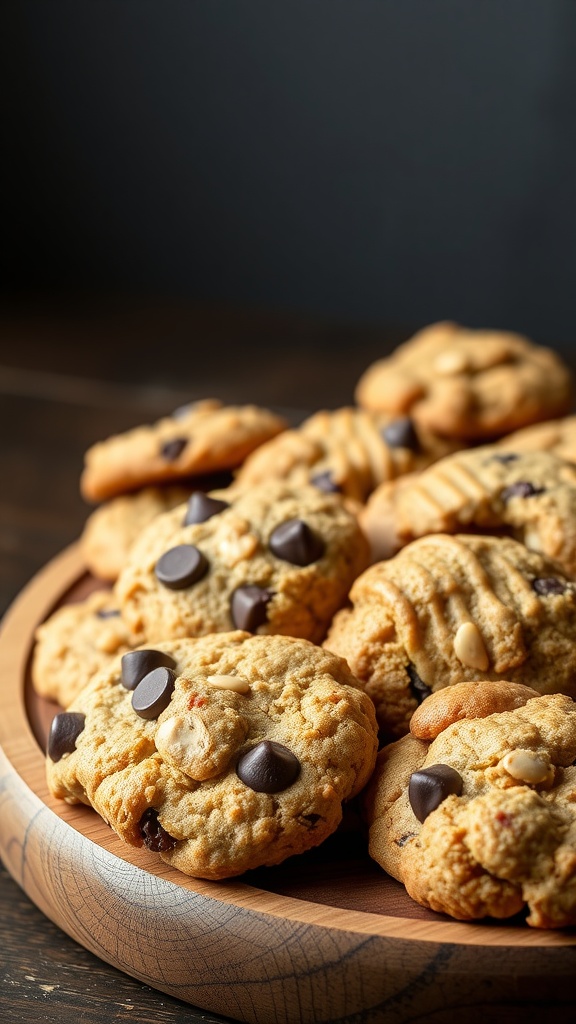
Gourmet Cookies Variety
When it comes to creating a dessert charcuterie board, gourmet cookies are a delightful addition. They bring a warm, comforting flavor that everyone loves. Whether you prefer chewy or crispy, chocolatey or nutty, there’s a cookie variety that can satisfy every sweet tooth. Plus, making a selection of cookies is a simple way to impress your guests during a charcuterie party or movie night snacks.
You can mix and match different flavors and textures to create a colorful cookie spread. Think of classic chocolate chip, oatmeal raisin, and peanut butter cookies, all arranged beautifully together. This assortment not only looks inviting but also allows everyone to choose their favorites. So, grab your ingredients and get ready to bake some cookies that will make your snack boards shine!
Ingredients
- 1 cup unsalted butter, softened
- 1 cup granulated sugar
- 1 cup brown sugar, packed
- 2 large eggs
- 2 teaspoons vanilla extract
- 3 cups all-purpose flour
- 1 teaspoon baking soda
- 1/2 teaspoon salt
- 1 cup chocolate chips
- 1 cup chopped nuts (optional)
Instructions
- Preheat your oven to 350°F (175°C). Line a baking sheet with parchment paper.
- In a large bowl, cream together the softened butter, granulated sugar, and brown sugar until smooth.
- Add the eggs one at a time, mixing well after each addition. Stir in the vanilla extract.
- In another bowl, whisk together the flour, baking soda, and salt. Gradually add this mixture to the wet ingredients until just combined.
- Fold in the chocolate chips and nuts, if using.
- Drop spoonfuls of dough onto the prepared baking sheet, leaving space between each cookie.
- Bake for 10-12 minutes, or until the edges are golden. Remove from the oven and let cool on the baking sheet for a few minutes before transferring to a wire rack.
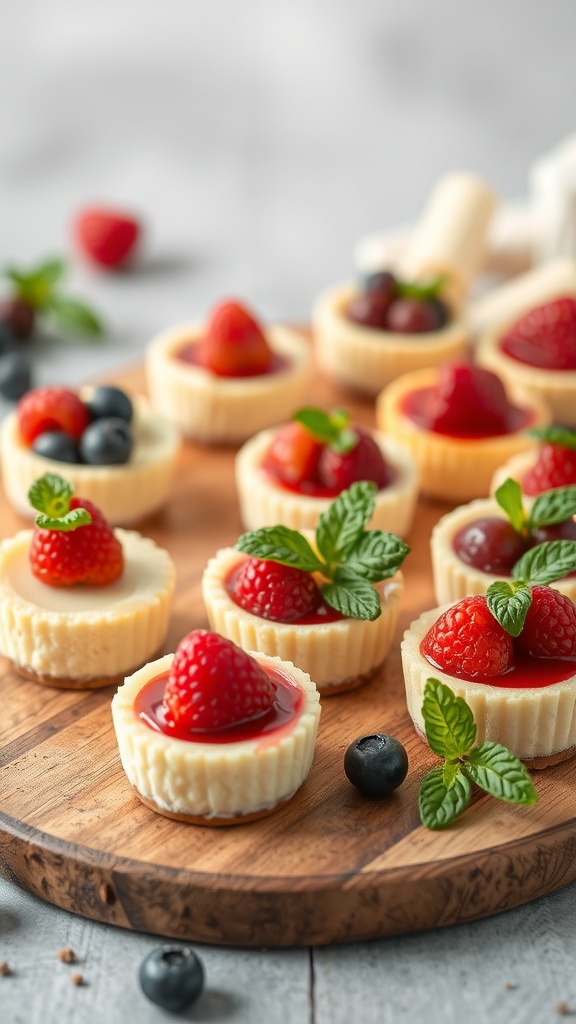
Cheesecake Bites Assortment
Cheesecake bites are a delightful and easy treat that works beautifully for any occasion. These mini delights combine the creamy richness of classic cheesecake with your favorite toppings, making them a perfect addition to your dessert charcuterie board. They’re not only tasty but also look adorable, making them a hit for gatherings like Board Night or your next Charcuterie Party.
With options for various toppings such as fresh berries, chocolate drizzle, or caramel sauce, you can customize each bite to suit different tastes. Plus, they are simple to make, so you can whip them up quickly for your Movie Night Snacks or just to satisfy your sweet tooth.
Ingredients
- 1 cup graham cracker crumbs
- 1/4 cup granulated sugar
- 1/2 cup unsalted butter, melted
- 16 oz cream cheese, softened
- 1/2 cup powdered sugar
- 1 teaspoon vanilla extract
- 1 cup sour cream
- Fresh berries (strawberries, blueberries, or raspberries) for topping
- Fruit preserves or chocolate sauce for drizzling
Instructions
- Preheat your oven to 325°F (160°C) and line a mini muffin pan with paper liners.
- In a bowl, mix graham cracker crumbs, granulated sugar, and melted butter until combined. Press about a teaspoon of the mixture into the bottom of each muffin liner to form a crust.
- In another bowl, beat the cream cheese until smooth. Gradually add powdered sugar and vanilla extract, mixing until creamy. Add sour cream and mix until well blended.
- Pour the cream cheese mixture over the crust in each liner, filling them about 3/4 full.
- Bake for 15-20 minutes or until the edges are set but the centers are still slightly jiggly. Let them cool completely before refrigerating for at least 2 hours.
- Before serving, top each cheesecake bite with fresh berries and a drizzle of fruit preserves or chocolate sauce.
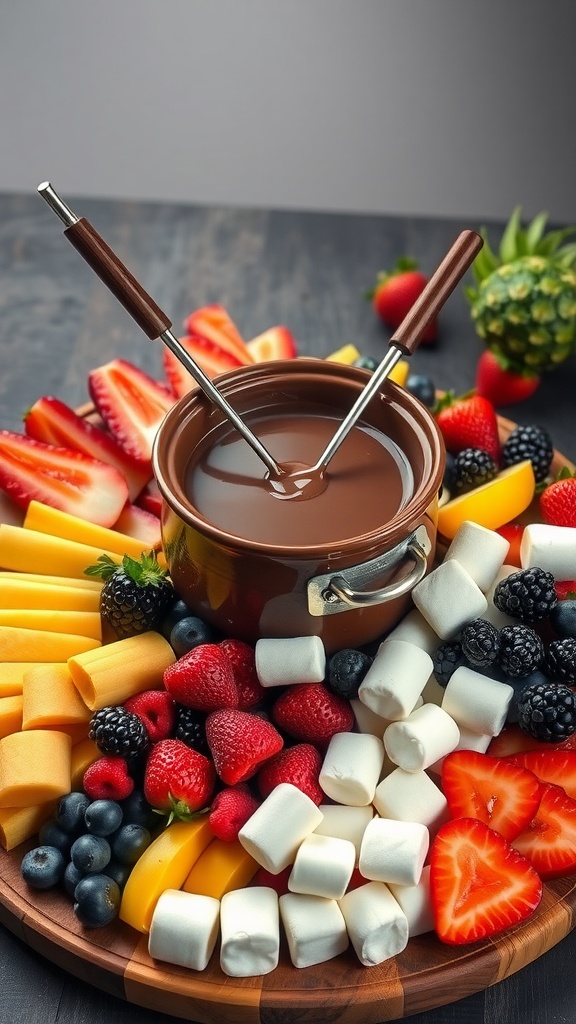
Chocolate Fondue Delight
Chocolate fondue is a delightful treat that turns any gathering into a fun and interactive experience. The rich, melted chocolate paired with a variety of dippable favorites makes every bite a sweet adventure. It’s incredibly simple to prepare, requiring just a few ingredients, and it’s always a hit at charcuterie parties or as movie night snacks.
Picture this: a warm pot of chocolate inviting you to dip fresh fruits, marshmallows, and even crunchy snacks. It’s perfect for sharing and encourages everyone to indulge in their favorite combinations. Whether you’re hosting a Board Night or enjoying a cozy evening at home, this chocolate fondue will surely be the star of the show.
Ingredients
- 1 cup semisweet chocolate chips
- 1/2 cup heavy cream
- 1 teaspoon vanilla extract
- Fresh strawberries
- Banana slices
- Marshmallows
- Apple slices
- Pineapple chunks
- Graham crackers
Instructions
- Prepare the Chocolate: In a small saucepan, combine the chocolate chips and heavy cream over low heat. Stir continuously until the chocolate is fully melted and smooth. Remove from heat and stir in the vanilla extract.
- Set Up the Fondue: Pour the melted chocolate into a fondue pot or a heatproof bowl to keep it warm.
- Prep the Dippers: Arrange your choice of dippable items on a large platter. Keep it colorful with fruits like strawberries, bananas, and pineapple, along with marshmallows and graham crackers.
- Enjoy: Gather your friends and family around and start dipping! Enjoy the delicious combinations as you share stories and laughter.
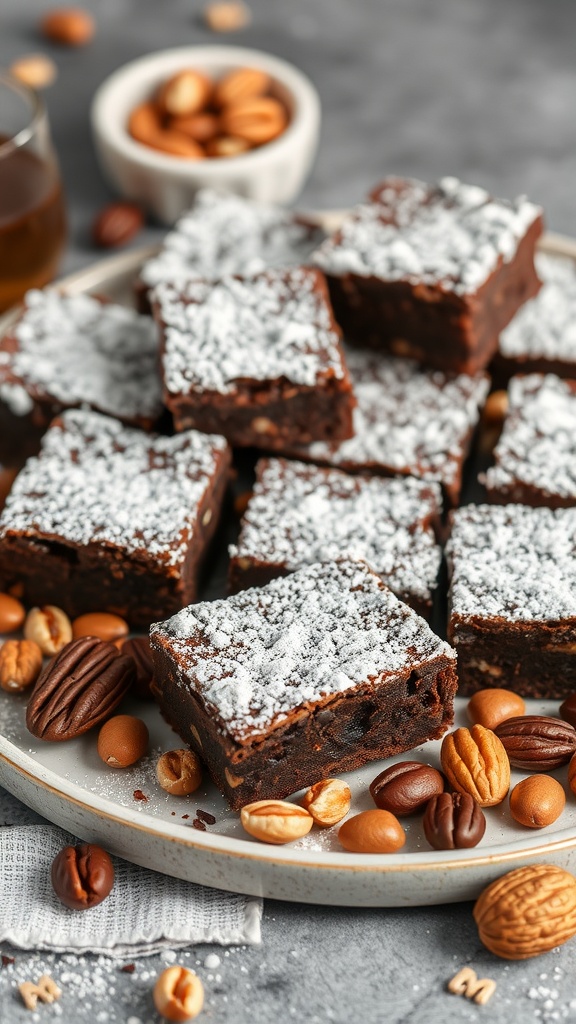
Decadent Brownie Squares
These decadent brownie squares are rich, fudgy, and a delightful addition to any dessert charcuterie board. They bring that perfect combination of chocolatey goodness and a chewy texture that makes them irresistible. Simple to make, these brownies are ideal for a cozy movie night or any gathering where snacks are essential.
Pair them with some nuts, fruits, or even a scoop of ice cream for a fun variety. Whether you’re planning a charcuterie party or just some casual snack boards, these brownie squares will surely impress your guests and satisfy your sweet tooth.
Ingredients
- 1 cup unsalted butter
- 2 cups granulated sugar
- 4 large eggs
- 1 teaspoon vanilla extract
- 1 cup all-purpose flour
- 1 cup unsweetened cocoa powder
- 1/2 teaspoon salt
- 1 cup chocolate chips (optional)
- Powdered sugar for dusting
Instructions
- Preheat the oven to 350°F (175°C) and grease a 9×13 inch baking pan.
- In a large saucepan, melt the butter over low heat. Remove from heat and stir in the sugar, eggs, and vanilla until well combined.
- Sift in the flour, cocoa powder, and salt. Stir until just combined, then fold in the chocolate chips if using.
- Pour the batter into the prepared baking pan and spread evenly.
- Bake for 25-30 minutes, or until a toothpick inserted into the center comes out with a few moist crumbs.
- Allow to cool before cutting into squares. Dust with powdered sugar before serving.
S’mores Station
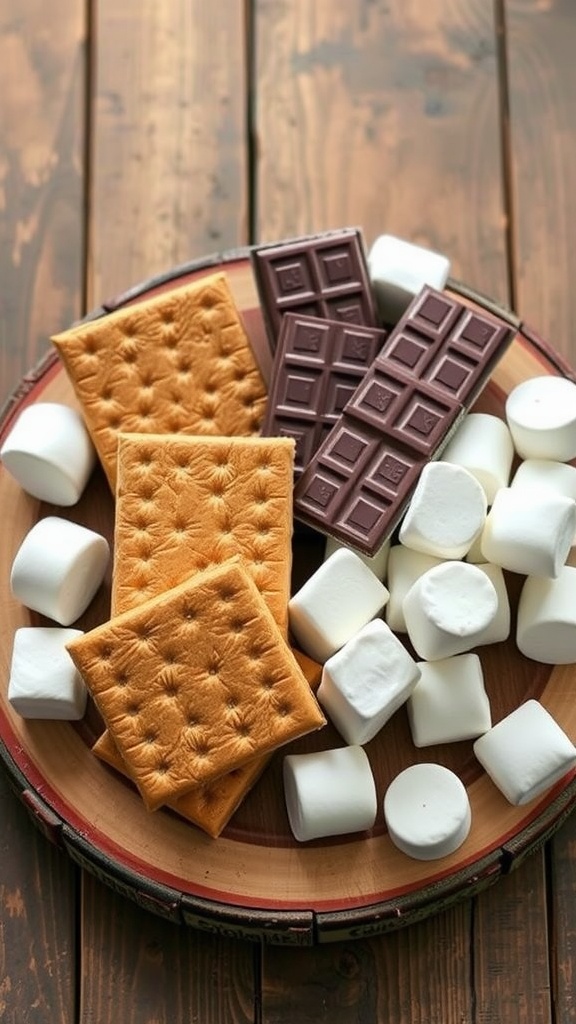
There’s something incredibly satisfying about creating your own s’mores, and setting up a S’mores Station is a fun way to enjoy this classic treat. With gooey marshmallows, rich chocolate, and crunchy graham crackers, each bite delivers a delightful combination of flavors and textures. It’s a simple yet indulgent experience that everyone will love, making it a perfect addition to your Movie Night Charcuterie or Board Night festivities.
Gather your friends or family and let each person customize their s’mores to their liking. Whether you prefer a classic combination or want to get creative with different chocolate types or added toppings, it’s all about enjoying the moment together. Plus, this setup is easy to make and requires minimal effort, so you can focus more on enjoying your Movie Night Snacks!
Ingredients
- 1 box of graham crackers
- 1 bag of marshmallows
- 2-3 chocolate bars (milk, dark, or flavored)
- Optional: peanut butter, caramel sauce, or fruit slices for extra toppings
Instructions
- Set up your S’mores Station by arranging graham crackers, marshmallows, and chocolate bars on a large platter or board.
- If using, place additional toppings like peanut butter, caramel, or fruit around the main ingredients.
- For roasting, you can use a campfire, stovetop, or kitchen torch to toast the marshmallows until golden brown.
- Assemble your s’mores by placing a roasted marshmallow between two graham crackers with a piece of chocolate. Add any extra toppings if desired.
- Enjoy your delicious, gooey creation while enjoying your favorite movie!
Pudding Parfaits
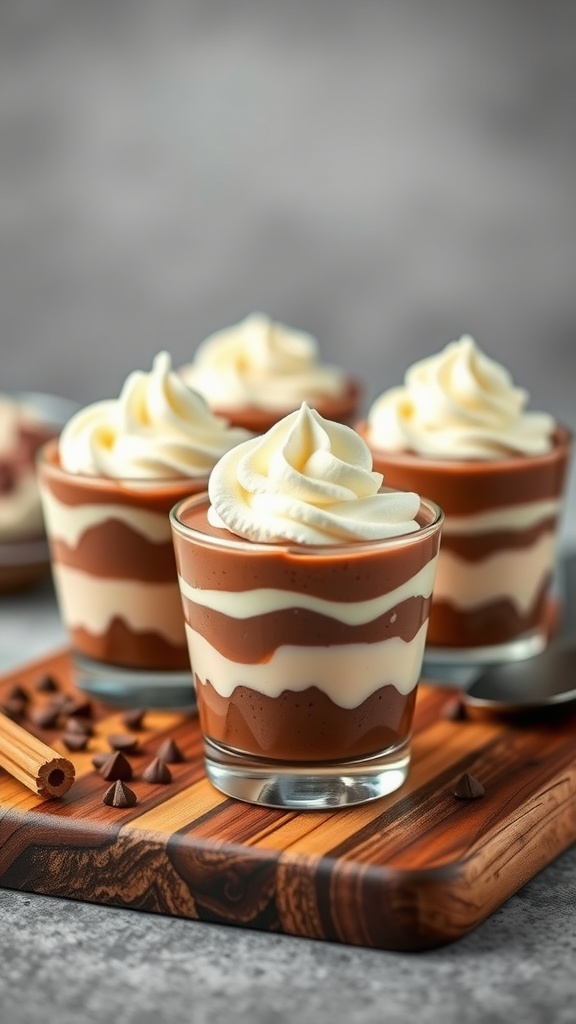
Pudding parfaits are a delightful treat that layers creamy pudding with whipped toppings and add-ins like crushed cookies or fresh fruit. This dessert is not only tasty but also incredibly easy to whip up, making it a perfect option for a casual gathering or a cozy movie night at home.
The smooth, rich flavors of pudding combined with the lightness of whipped cream create a satisfying dessert experience. Whether you go for classic chocolate or vanilla, these parfaits can be customized to fit any occasion. They are a fun addition to any charcuterie party, adding a sweet touch to your snack boards.
Ingredients
- 2 cups chocolate pudding
- 2 cups vanilla pudding
- 1 cup whipped cream
- 1 cup crushed chocolate cookies
- 1/2 cup chocolate chips (for garnish)
- 1/2 teaspoon vanilla extract
Instructions
- Prepare Puddings: Follow the instructions on the pudding mix to prepare both chocolate and vanilla puddings. Allow them to cool and thicken in the fridge.
- Layer Puddings: In clear cups or small glasses, start by adding a layer of chocolate pudding. Follow with a layer of whipped cream, then add a layer of vanilla pudding.
- Add Crunch: Sprinkle a layer of crushed chocolate cookies on top of the vanilla pudding. Repeat the layers until the cups are filled, finishing with whipped cream on top.
- Garnish: Sprinkle chocolate chips over the whipped cream for extra flavor and visual appeal.
- Chill and Serve: Refrigerate the parfaits for at least 30 minutes before serving to allow the flavors to meld.
Candy Land Extravaganza
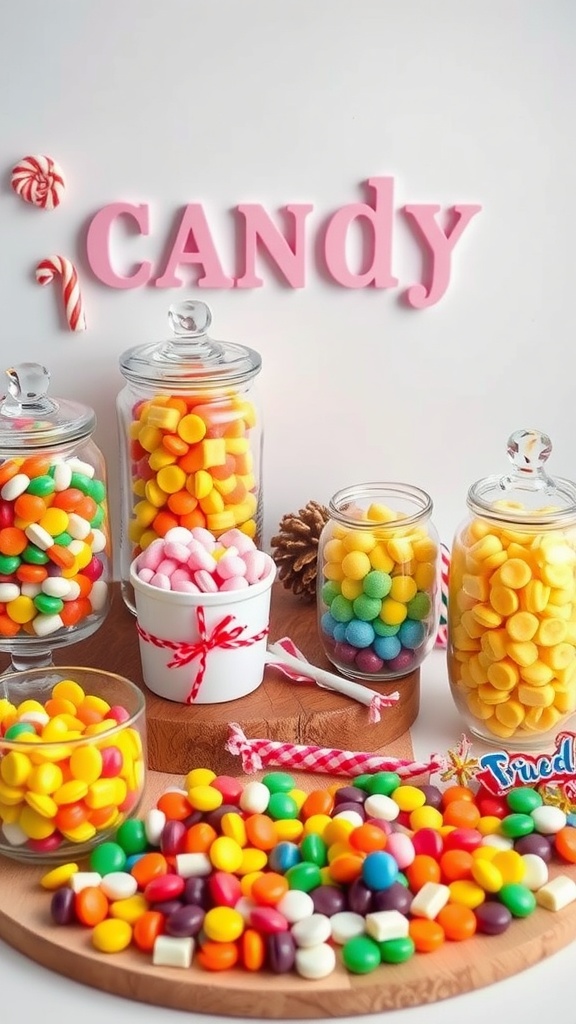
If you’re looking to create a fun and vibrant dessert spread, a Candy Land Extravaganza is the way to go. This colorful charcuterie board is packed with all kinds of candies that will delight both kids and adults alike. The mix of flavors and textures makes it not only a treat for the taste buds but also a feast for the eyes.
Assembling this board is super simple and doesn’t require any cooking skills at all! Just pick your favorite candies, arrange them in a visually appealing way, and watch everyone enjoy. It’s perfect for a Charcuterie Party, movie night, or any fun gathering where you want to bring a little sweetness into the mix.
Ingredients
- 1 cup gummy bears
- 1 cup chocolate-covered pretzels
- 1 cup jellybeans
- 1 cup colorful candy-coated chocolates
- 1 cup sour candies
- 1 cup licorice pieces
- 1 cup cotton candy
- 1 cup rock candy
- Optional: mini candy canes for decoration
Instructions
- Gather all your chosen candies and different-sized bowls or jars to hold them.
- Start by placing the larger items, like bowls filled with gummy bears and chocolate-covered pretzels, in various spots on the board.
- Fill in the gaps with smaller candies, like jellybeans and candy-coated chocolates, to create a colorful mosaic.
- Add a few fluffy pockets of cotton candy and sprinkle some rock candy for extra flair.
- Lastly, if using, place mini candy canes around the board for added decoration.
- Serve and enjoy your Candy Land Extravaganza!
Ice Cream Sundae Bar
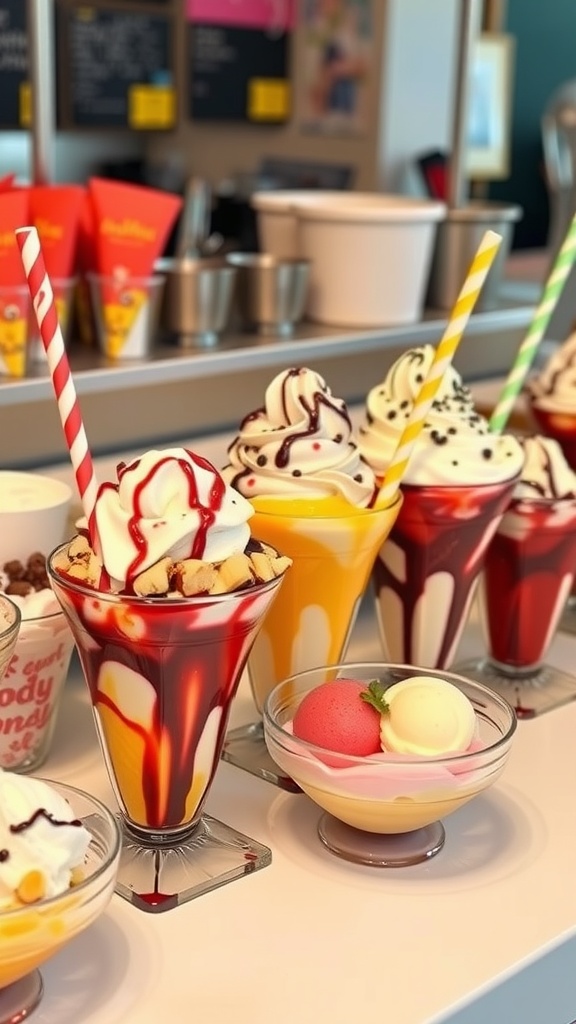
An Ice Cream Sundae Bar is a delightful way to celebrate any occasion, making it a fantastic addition to your next charcuterie party or movie night snacks. This setup invites everyone to create their own personal sundae, choosing from a variety of ice creams, toppings, and sauces. It’s sweet, creamy, and offers endless combinations that can satisfy any sweet tooth!
Setting up your sundae bar is simple and fun—just gather your favorite ice cream flavors and an assortment of toppings like sprinkles, nuts, whipped cream, and chocolate syrup. It’s perfect for engaging guests and allows for creativity, as everyone can build a sundae tailored to their taste. So why not bring a board filled with delicious treats for your next get-together? This sundae bar is sure to be a hit!
Ingredients
- 4-6 varieties of ice cream (vanilla, chocolate, strawberry, mint chocolate chip, etc.)
- Whipped cream
- Chocolate syrup
- Caramel sauce
- Sprinkles
- Nuts (chopped peanuts, almonds, etc.)
- Cherries
- Cookie crumbles
- Fresh fruit (bananas, strawberries, etc.)
Instructions
- Set up your sundae station: Place the ice cream in bowls or containers and set them on a table or countertop.
- Arrange all the toppings in separate bowls, making sure to label them if necessary.
- Provide spoons, bowls, and napkins for easy serving.
- Invite your guests to scoop their favorite ice cream into bowls and add their desired toppings.
- Enjoy your sundae creations together!
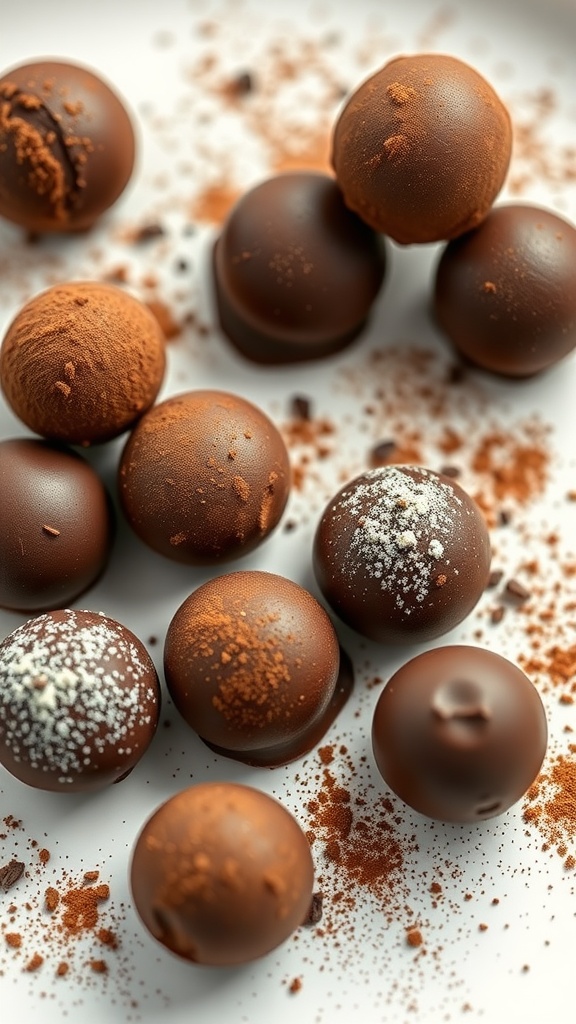
Chocolate Truffle Selection
Chocolate truffles are a delightful addition to any charcuterie board, perfect for satisfying that sweet tooth. These rich, creamy treats come in various flavors and textures, making them an ideal choice for movie night snacks or any festive gathering.
Not only are they simple to make, but they also offer a touch of elegance to your charcuterie ideas. You can customize them with different coatings, fillings, and flavorings, giving your board a personal touch that everyone will appreciate during your next charcuterie party.
Ingredients
- 1 cup heavy cream
- 8 ounces semisweet chocolate, chopped
- 1 teaspoon vanilla extract
- Cocoa powder, for dusting
- Chopped nuts or sprinkles (optional)
Instructions
- Heat the Cream: In a saucepan, bring the heavy cream to a gentle simmer over medium heat. Remove from heat just before it starts to boil.
- Melt the Chocolate: Add the chopped semisweet chocolate to the warm cream. Let it sit for a minute, then stir until smooth and fully melted. Stir in the vanilla extract.
- Chill the Mixture: Pour the chocolate mixture into a bowl and cover it with plastic wrap. Refrigerate for about 2 hours, or until firm enough to scoop.
- Form the Truffles: Once the mixture is chilled, use a small scoop or your hands to form balls of chocolate. Roll them between your palms to create smooth, round truffles.
- Coat the Truffles: Roll each truffle in cocoa powder, chopped nuts, or sprinkles to finish. Place them on a parchment-lined tray.
- Serve: Chill the truffles again for about 30 minutes before serving them on your movie night charcuterie board.
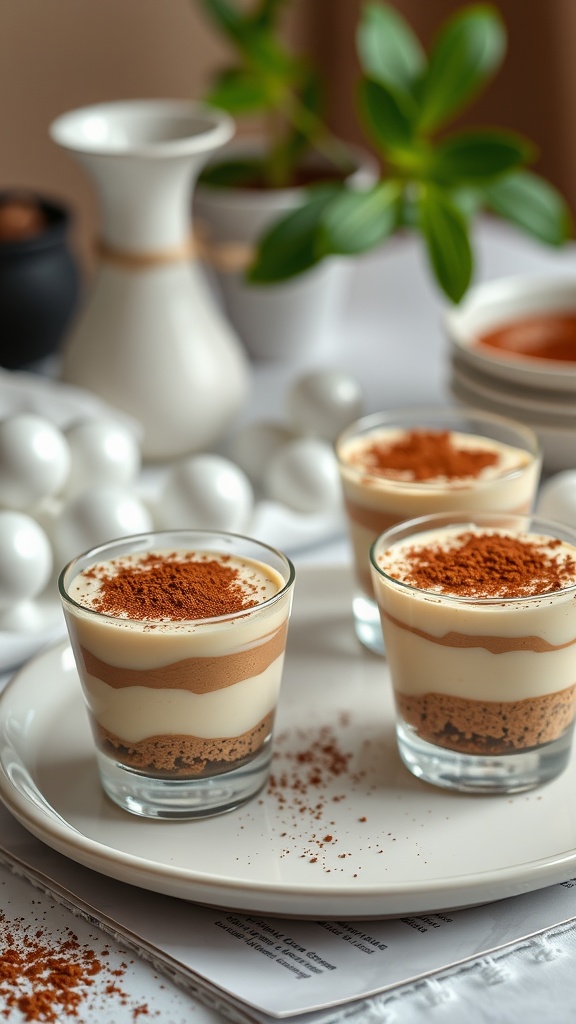
Tiramisu Cups
Tiramisu cups are a delightful twist on the classic Italian dessert, served in individual portions that make them perfect for sharing at a Charcuterie Party or enjoying as Movie Night Snacks. The layers of coffee-soaked ladyfingers, creamy mascarpone, and a dusting of cocoa create a rich and velvety experience that’s both indulgent and satisfying. Plus, they’re surprisingly simple to prepare, making them a great addition to any Snack Board.
These little treats combine the beloved flavors of tiramisu without the fuss of a traditional cake. They’re versatile, too; you can customize them to suit your tastes or the theme of your gathering. Whether it’s a cozy Board Night or a festive Movie Night Charcuterie Board, these cups will surely impress everyone.
Ingredients
- 1 cup strong brewed coffee, cooled
- 1 tablespoon coffee liqueur (optional)
- 2 cups mascarpone cheese
- 1 cup heavy cream
- 1/2 cup powdered sugar
- 1 teaspoon vanilla extract
- 1 package ladyfinger cookies
- Cocoa powder for dusting
Instructions
- Prepare the Coffee: In a bowl, mix the cooled brewed coffee with coffee liqueur if using. Set aside.
- Make the Cream Mixture: In a separate bowl, beat the heavy cream until stiff peaks form. In another bowl, mix the mascarpone cheese, powdered sugar, and vanilla until smooth. Gently fold the whipped cream into the mascarpone mixture.
- Layer the Cups: Dip each ladyfinger briefly in the coffee mixture and place them in the bottom of serving cups. Spoon a layer of the mascarpone mixture over the ladyfingers. Repeat the layers until the cups are filled, finishing with the mascarpone on top.
- Chill and Serve: Refrigerate the tiramisu cups for at least 4 hours, or overnight if possible. Before serving, dust the tops with cocoa powder for an elegant touch.
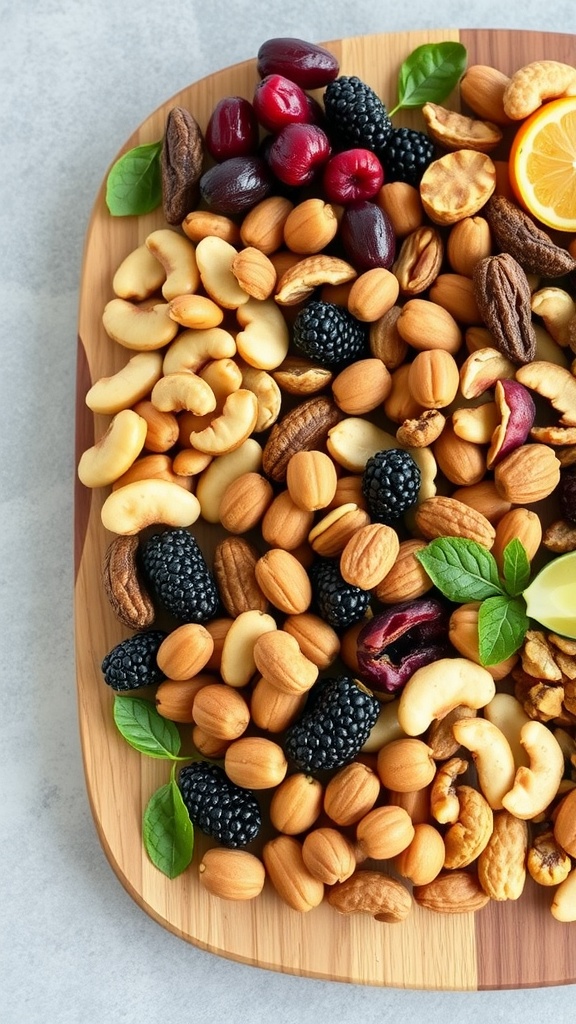
Nut and Dried Fruit Medley
A Nut and Dried Fruit Medley is a delightful mix that’s perfect for a casual gathering or a cozy movie night. This recipe combines the crunchiness of nuts with the sweetness of dried fruits, creating a wholesome snack that’s both satisfying and nutritious. It’s simple to whip up and can be customized to suit your taste, making it a great addition to any charcuterie party or snack board.
The combination of flavors and textures brings a burst of excitement to your palate. Whether you’re enjoying it while watching your favorite films or serving it at your next Board Night, this medley is sure to be a hit. Plus, it’s an easy way to incorporate healthy ingredients into your Movie Night Snacks!
Ingredients
- 1 cup mixed nuts (almonds, cashews, walnuts)
- 1 cup dried fruit (cranberries, apricots, raisins)
- 1/2 cup dark chocolate chips (optional)
- 1/4 teaspoon sea salt
- 1 tablespoon honey or maple syrup (for drizzling)
Instructions
- Combine Nuts and Fruit: In a large bowl, mix together the nuts and dried fruit until evenly distributed.
- Add Chocolate (Optional): If using, gently fold in the dark chocolate chips.
- Season: Sprinkle with sea salt and drizzle honey or maple syrup over the mix for extra sweetness.
- Toss and Serve: Toss the mixture well to combine all flavors, then transfer to a serving dish. Enjoy your Nut and Dried Fruit Medley as a delightful snack or part of your Movie Night Charcuterie Board!
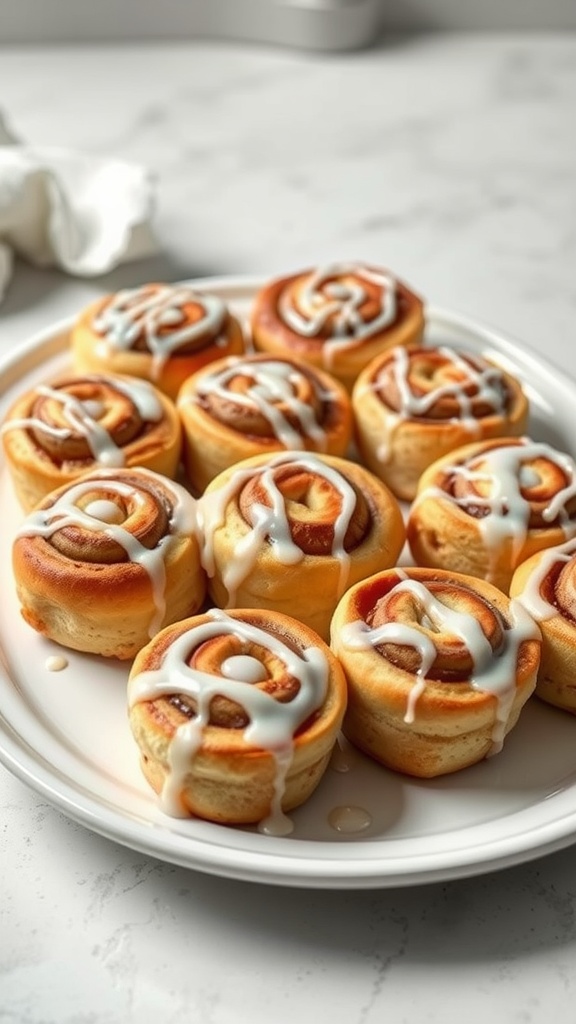
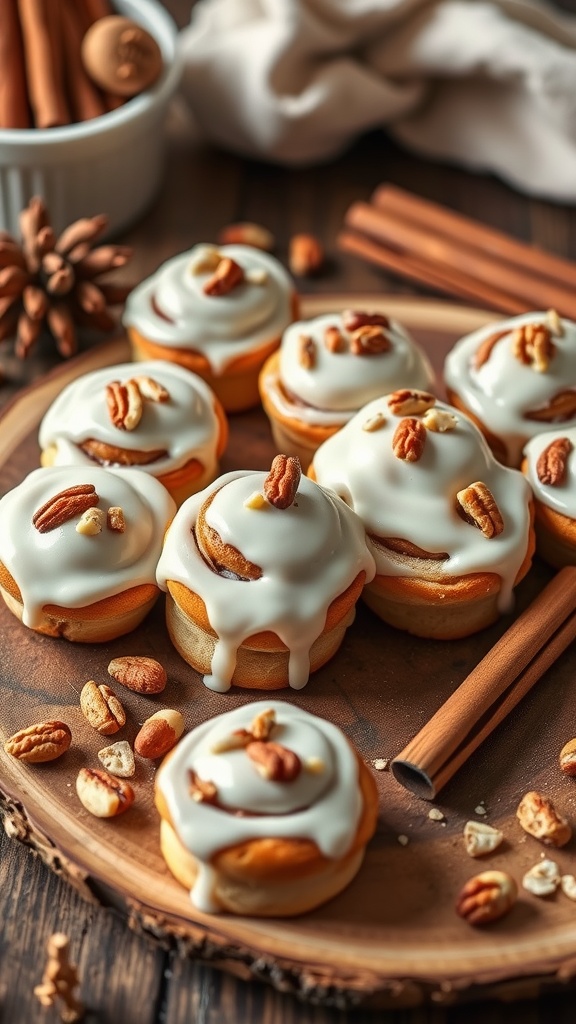
Cinnamon Roll Bites
Cinnamon roll bites are the ideal sweet treat that combines the warm, comforting flavors of cinnamon and sugar in a fun, bite-sized form. These little rolls are soft, gooey, and drizzled with a creamy icing, making them perfect for any Snack Board. Whether for a cozy Movie Night or a casual Board Night with friends, these bites are sure to be a hit!
Making cinnamon roll bites is simple and requires minimal ingredients. They’re easy to pop in your mouth, making them an irresistible addition to your dessert charcuterie. Plus, they can be prepared ahead of time, letting you enjoy your gathering without a fuss. Let’s dive into the recipe!
Ingredients
- 2 cups all-purpose flour
- 1/4 cup granulated sugar
- 2 teaspoons baking powder
- 1/2 teaspoon salt
- 1/4 cup unsalted butter, melted
- 3/4 cup milk
- 1/2 cup packed brown sugar
- 2 tablespoons ground cinnamon
- 1/4 cup unsalted butter, softened
- 1 cup powdered sugar
- 2 tablespoons milk (for the frosting)
Instructions
- Preheat the oven to 350°F (175°C) and grease a muffin tin.
- In a large bowl, mix flour, sugar, baking powder, and salt. Add melted butter and milk, stirring until just combined.
- In a separate small bowl, mix brown sugar and cinnamon. Roll out the dough into a rectangle, spread softened butter over the surface, and sprinkle the cinnamon mixture evenly.
- Roll the dough tightly and cut it into bite-sized pieces. Place each piece into the muffin tin.
- Bake for 15-20 minutes or until golden brown.
- While they cool, whisk together powdered sugar and milk to create the icing. Drizzle over the warm cinnamon roll bites before serving.
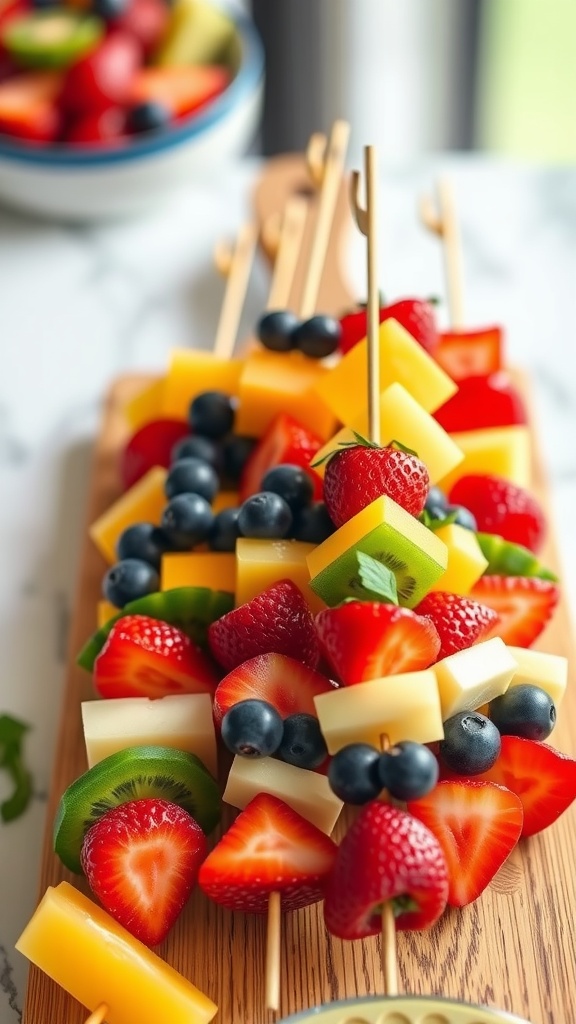
Fruit Skewer Arrangement
Fruit skewers are a delightful addition to any charcuterie party, combining vibrant colors and fresh flavors that appeal to everyone. These easy-to-make treats are not only visually appealing but also provide a refreshing break from heavier snacks. Perfect for a movie night or a casual get-together, fruit skewers are both fun to eat and simple to assemble, making them a hit for all ages.
With just a few ingredients, you can create a stunning arrangement that brings a burst of sweetness to your board. Mix and match your favorite fruits and cheeses for a tasty combination that will have your guests reaching for more. Here’s a quick recipe to create your own fruit skewer masterpiece:
Ingredients
- 1 cup strawberries, hulled and halved
- 1 cup pineapple, cut into cubes
- 1 cup kiwi, sliced
- 1 cup blueberries
- 1 cup cheddar cheese, cut into cubes
- 1 cup mozzarella cheese, cut into cubes
- Fresh mint leaves for garnish
- Skewers or toothpicks
Instructions
- Prepare the Fruit and Cheese: Wash and cut all the fruits and cheese into bite-sized pieces.
- Assemble the Skewers: Take a skewer and start threading the fruit and cheese pieces in an alternating pattern. Start with a strawberry, then a piece of cheese, followed by a kiwi slice, and continue until the skewer is filled.
- Garnish: Once all the skewers are assembled, place them on a platter and garnish with fresh mint leaves for a pop of color.
- Serve and Enjoy: These fruit skewers are best served fresh. They make an excellent addition to any movie night charcuterie board or board night setup!
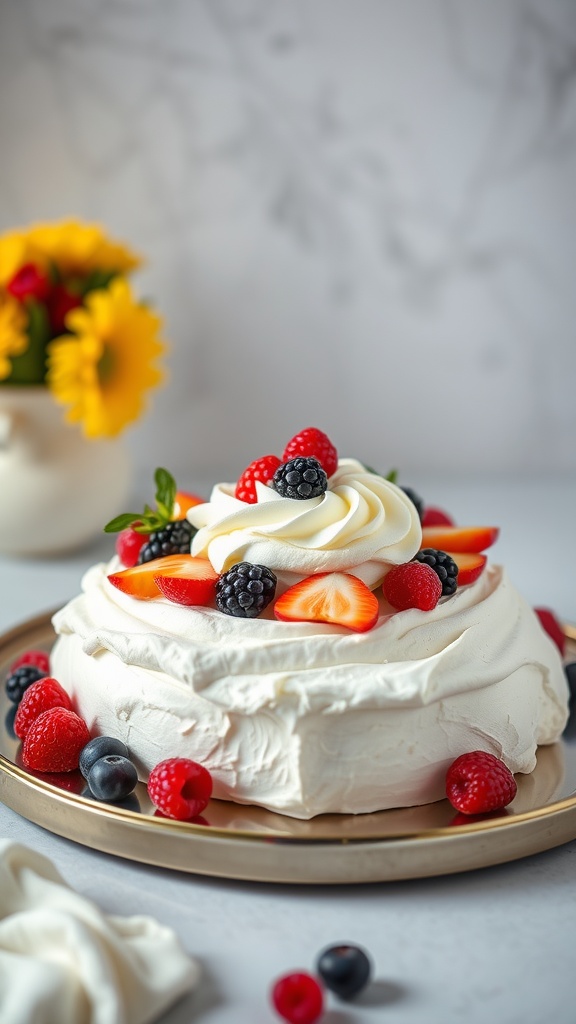
Pavlova Presentation
Pavlova is a delightful dessert that combines a light and crispy meringue shell with a soft, marshmallow-like center. Topped with fresh whipped cream and an array of colorful fruits, this dessert is as pleasing to the eyes as it is to the palate. It’s a wonderful choice for charcuterie ideas, especially at a charcuterie party or for special occasions.
The taste is a perfect balance of sweetness from the meringue and tartness from the fruits, making it a refreshing choice for any dessert table. Plus, it’s relatively simple to assemble, making it a great option for movie night snacks or a casual board night with friends!
Ingredients
- 4 large egg whites
- 1 cup granulated sugar
- 1 teaspoon vanilla extract
- 1 teaspoon white vinegar
- 2 teaspoons cornstarch
- 1 cup heavy whipping cream
- 2 tablespoons powdered sugar
- 1 teaspoon vanilla extract (for the cream)
- Mixed fresh fruits (strawberries, blueberries, raspberries, blackberries)
Instructions
- Preheat your oven to 275°F (135°C) and line a baking sheet with parchment paper.
- In a large bowl, beat the egg whites until soft peaks form. Gradually add the granulated sugar, continuing to beat until stiff peaks form. Mix in the vanilla, vinegar, and cornstarch until fully combined.
- Spread the meringue mixture into a circle on the prepared baking sheet, making a slight indentation in the center for the filling.
- Bake for about 1 hour or until the meringue is dry and crisp on the outside. Turn off the oven and let it cool completely inside.
- Once cooled, whip the heavy cream with powdered sugar and vanilla until soft peaks form. Spoon the whipped cream over the meringue, then top with fresh fruits.
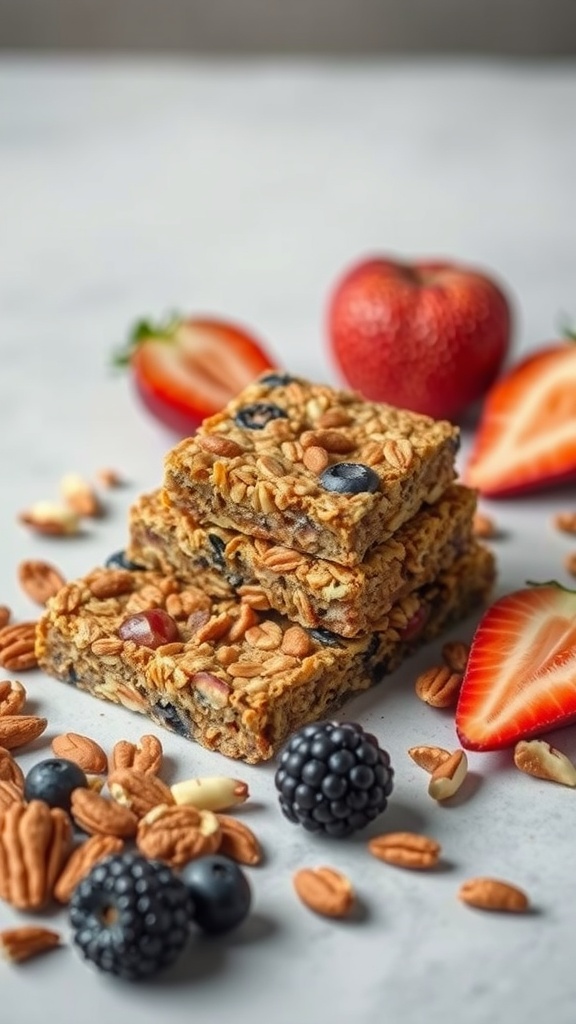
Chewy Granola Bars
Chewy granola bars are a delightful treat that combines wholesome ingredients into a tasty snack. They offer a satisfying chewiness with every bite, making them perfect for any charcuterie party or as a quick grab-and-go option for movie night snacks. Plus, they are super easy to whip up with minimal prep time!
These bars are packed with the goodness of oats, nuts, and dried fruits, delivering a sweet yet nutritious option for your snack boards. Whether you’re hosting a board night or just looking for something to munch on while enjoying a movie, these chewy granola bars will hit the spot!
Ingredients
- 2 cups rolled oats
- 1 cup mixed nuts (such as almonds, walnuts, and pecans)
- 1/2 cup honey or maple syrup
- 1/2 cup nut butter (like peanut or almond butter)
- 1/2 cup dried fruits (like cranberries or raisins)
- 1/2 teaspoon vanilla extract
- 1/4 teaspoon salt
Instructions
- Preheat the oven to 350°F (175°C) and line an 8×8-inch baking dish with parchment paper.
- In a large bowl, combine rolled oats, mixed nuts, dried fruits, and salt.
- In a small saucepan, heat honey and nut butter over low heat until melted and smooth. Stir in the vanilla extract.
- Pour the honey mixture over the oat mixture and stir until well combined.
- Transfer the mixture to the prepared baking dish, pressing it down firmly into an even layer.
- Bake for 20-25 minutes, or until golden brown. Allow to cool completely before slicing into bars.
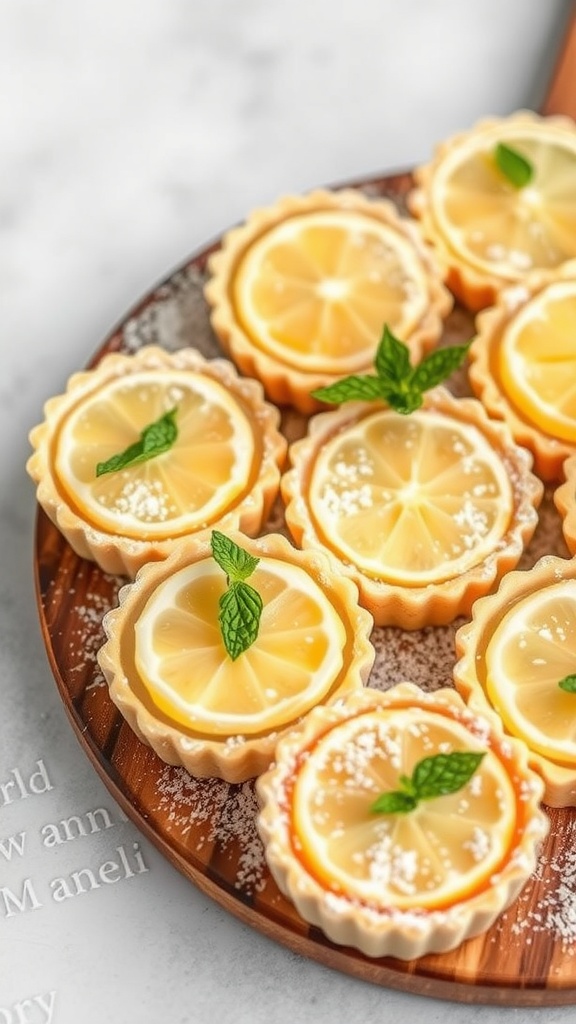
Lemon Tart Slices
Lemon tart slices are a delightful addition to any dessert charcuterie board. Their bright, lemony flavor offers a refreshing contrast to richer desserts, making them a perfect choice for a balanced snack spread. These treats are wonderfully easy to make, allowing you to whip them up quickly for your next board night or a casual get-together.
The crisp, buttery crust combined with the zesty filling creates a harmonious blend that appeals to all taste buds. Whether you’re hosting a charcuterie party, preparing for movie night snacks, or simply craving something sweet, lemon tart slices will definitely elevate your dessert selection.
Ingredients
- 1 cup all-purpose flour
- 1/4 cup powdered sugar
- 1/2 cup unsalted butter, softened
- 1/4 teaspoon salt
- 2 large eggs
- 1 cup granulated sugar
- 1/4 cup fresh lemon juice
- Zest of 1 lemon
- 1/4 cup heavy cream
Instructions
- Preheat your oven to 350°F (175°C). In a mixing bowl, combine flour, powdered sugar, softened butter, and salt to form a crumbly dough.
- Press the dough into the bottom of a tart pan evenly. Bake for about 15 minutes or until golden brown.
- In another bowl, whisk together eggs, granulated sugar, lemon juice, lemon zest, and heavy cream until well combined.
- Pour the lemon mixture over the pre-baked crust and return to the oven. Bake for an additional 20-25 minutes until the filling is set.
- Let cool completely before slicing into squares or wedges. Serve chilled on your snack boards or alongside your favorite movie night food!
23 Delicious Dessert Charcuterie Board Ideas to Satisfy Your Sweet Tooth
If you’re looking to satisfy your sweet tooth and impress friends at your next gathering, dessert charcuterie boards are the way to go! These boards offer a delightful mix of chocolates, fruits, pastries, and other treats that cater to every taste. Dive into our collection of 23 yummy dessert charcuterie board ideas that will inspire your sweet spread!
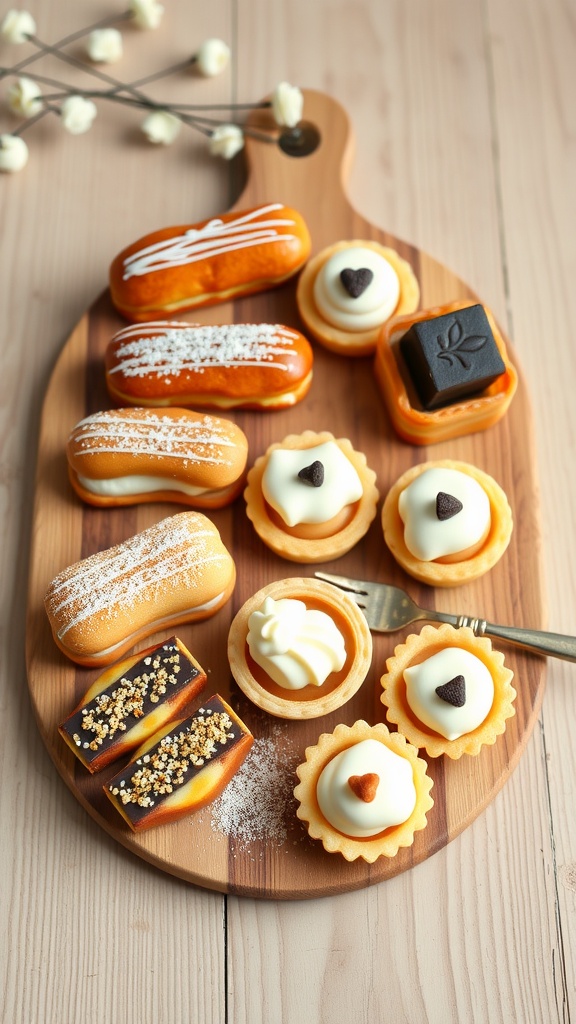
Mini Pastry Paradise
Imagine a delightful spread of mini pastries that bring joy to every bite! These sweet treats are perfect for adding a touch of elegance to your next charcuterie night or movie night. Flaky, creamy, and bursting with flavor, they make for a fantastic dessert option that’s surprisingly simple to assemble.
With an array of textures and flavors, mini pastries can cater to every palate. They’re not just tasty; they also look adorable on a snack board! Whether you’re hosting a charcuterie party or preparing movie night snacks, these little gems will surely impress your guests. Here’s how to create your own mini pastry paradise:
Ingredients
- 1 package of puff pastry sheets
- 1 cup pastry cream
- 1/2 cup whipped cream
- 1/4 cup chocolate ganache
- 1/4 cup fresh fruit or berries
- Powdered sugar for dusting
- Chocolate chips for garnish
Instructions
- Prepare the Pastry: Preheat your oven to 400°F (200°C). Roll out the puff pastry sheets and cut them into small squares or circles. Place them on a baking tray lined with parchment paper.
- Bake: Bake for about 15-20 minutes until golden and puffed. Let them cool completely.
- Fill with Pastry Cream: Using a piping bag, fill half of the pastries with pastry cream. For the other half, add whipped cream to create a mix of flavors.
- Top with Ganache: Drizzle chocolate ganache over some pastries and add fresh fruit or berries on others for a burst of color.
- Garnish: Finish off with a sprinkle of powdered sugar and a few chocolate chips on top for that extra touch.
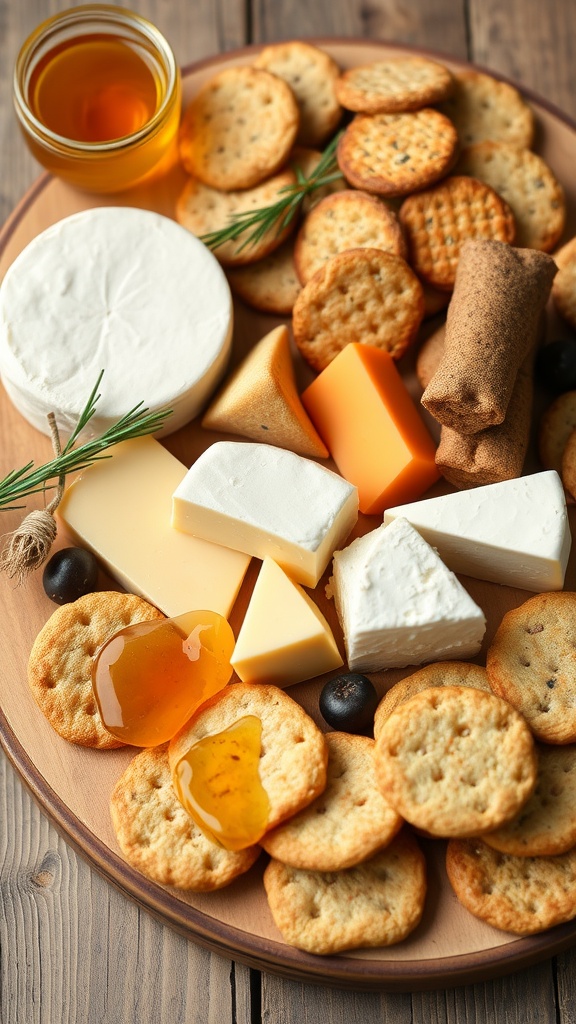
Classic Cheese and Crackers Dessert Board
A Classic Cheese and Crackers Dessert Board is a delightful way to bring together your favorite flavors in a casual and inviting presentation. It pairs creamy and tangy cheeses with a variety of crunchy crackers, offering a satisfying combination of textures and tastes. This board is not only delicious but also incredibly easy to put together, making it perfect for any gathering, whether it’s a Charcuterie Party or a cozy Movie Night with friends.
The flexibility of this board allows you to choose your favorite cheeses—think soft brie, sharp cheddar, or creamy goat cheese—and pair them with an assortment of crackers and sweet accompaniments like honey or fruit preserves. It’s a simple yet sophisticated option that can cater to everyone’s taste buds.
Ingredients
- 8 ounces brie cheese
- 8 ounces cheddar cheese
- 8 ounces goat cheese
- 1 box assorted crackers
- 1/2 cup honey
- 1/2 cup fruit preserves (apricot or raspberry works well)
- Fresh rosemary or thyme for garnish
Instructions
- Prepare the Board: Start by selecting a large wooden or marble board to serve your cheeses and crackers. Arrange the cheeses in a visually appealing manner, cutting some into wedges for easy serving.
- Add Crackers: Fill in the gaps with a variety of crackers. You can mix different shapes and flavors to add visual interest.
- Incorporate Sweetness: Place small bowls of honey and fruit preserves on the board. This will allow guests to drizzle or spread these sweet toppings on their cheese and crackers.
- Garnish: Finally, add a few sprigs of fresh rosemary or thyme for a pop of color and aroma.
- Serve and Enjoy: Let everyone help themselves to create their own delicious combinations. This board is sure to be a hit at any gathering!
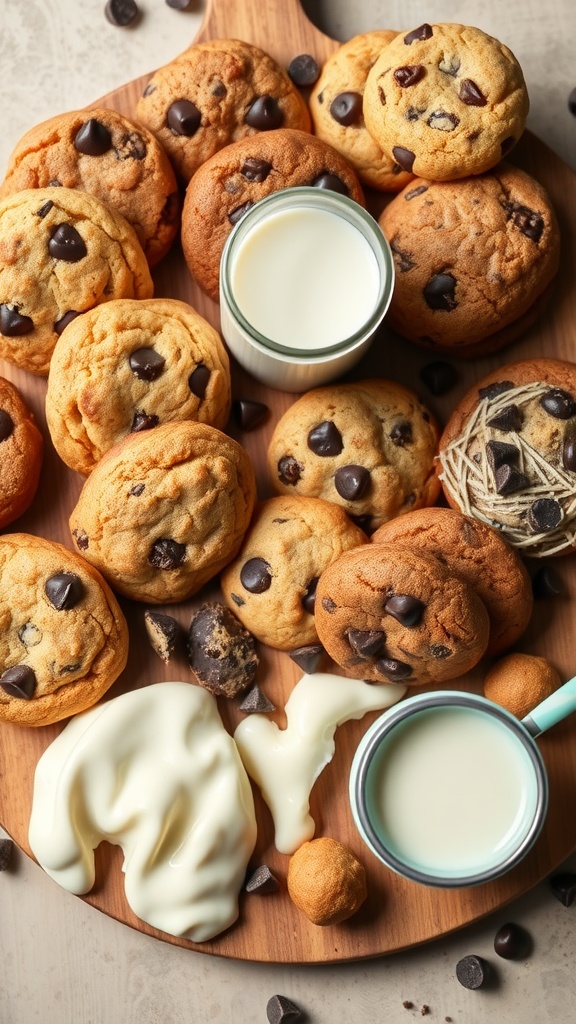
Gourmet Cookie Collection
Imagine a delightful spread of cookies that cater to every sweet tooth, perfect for your next charcuterie party or movie night. A gourmet cookie collection brings together an assortment of flavors and textures, making it a fun and indulgent option for everyone. With a mix of chewy chocolate chip, rich double chocolate, and even a touch of sprinkle sugar cookies, this collection is not only delicious but also simple to create. It’s an inviting way to elevate your snack boards and turn an ordinary evening into something special.
These cookies can be made ahead of time, allowing you to focus on enjoying the company of friends and family. Pair them with a glass of milk or a scoop of ice cream, and you have a treat that satisfies cravings and sparks joy. So, let’s dive into a recipe that will fill your charcuterie board with mouthwatering cookies!
Ingredients
- 2 1/4 cups all-purpose flour
- 1 teaspoon baking soda
- 1/2 teaspoon salt
- 1 cup unsalted butter, softened
- 3/4 cup granulated sugar
- 3/4 cup brown sugar, packed
- 1 teaspoon vanilla extract
- 2 large eggs
- 2 cups semi-sweet chocolate chips
- 1 cup chopped nuts (optional)
Instructions
- Preheat your oven to 350°F (175°C) and line baking sheets with parchment paper.
- In a bowl, whisk together flour, baking soda, and salt. Set aside.
- In a large mixing bowl, beat the softened butter, granulated sugar, brown sugar, and vanilla until creamy.
- Add in the eggs, one at a time, mixing well after each addition.
- Gradually blend in the dry ingredients until just combined. Stir in chocolate chips and nuts if using.
- Drop tablespoon-sized amounts of dough onto the prepared baking sheets, spacing them a few inches apart.
- Bake for 10-12 minutes or until the edges are golden brown. Let cool on the baking sheet for a few minutes before transferring to a wire rack.
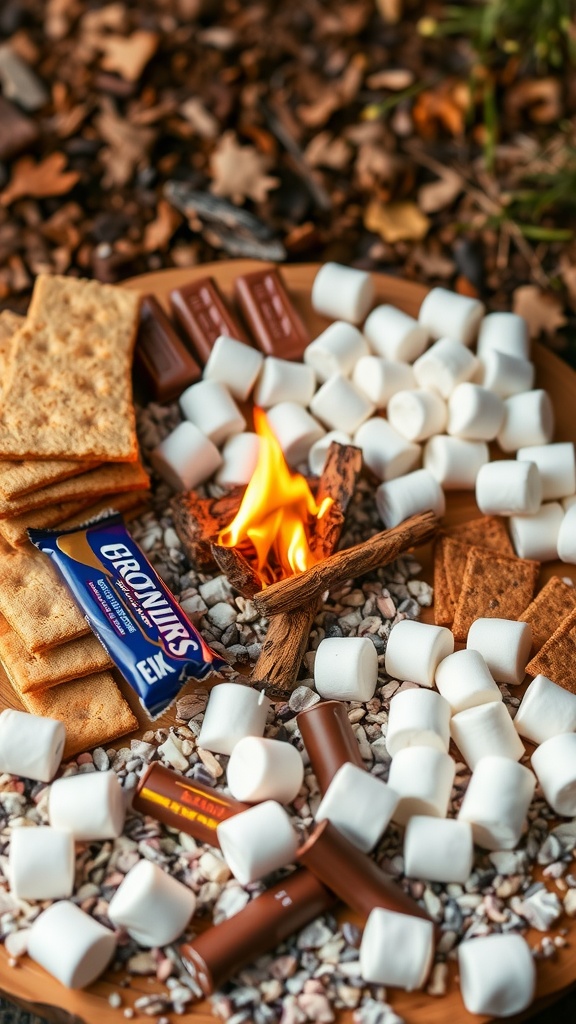
S’mores Inspired Board
S’mores are a classic treat that brings back memories of campfires and warm summer nights. This S’mores Inspired Charcuterie Board combines crunchy graham crackers, gooey marshmallows, and rich chocolate for an irresistible dessert experience. Perfect for sharing with friends or family, this board is not only delicious but also incredibly easy to assemble, making it an ideal option for your next Board Night or Movie Night.
The combination of sweet and savory elements makes this board a hit for any occasion. It encourages creativity, allowing everyone to build their own s’mores just the way they like them. Set it up for a cozy night in, and watch as everyone piles their favorite ingredients together. Get ready for sticky fingers and happy smiles!
Ingredients
- 1 box of graham crackers
- 1 bag of large marshmallows
- 2-3 chocolate bars (like Hershey’s or your favorite)
- Optional: flavored chocolate (dark, milk, or white)
- Optional: toppings like peanut butter, caramel, or nuts
Instructions
- Arrange graham crackers on a large serving platter or board.
- Scatter marshmallows and chocolate bars around the crackers.
- If desired, add any additional toppings like flavored chocolate, peanut butter, or caramel in small bowls for easy access.
- Light a fire pit or use a kitchen torch to roast marshmallows, or set out a microwave for easy melting.
- Invite guests to create their own s’mores by stacking a roasted marshmallow between two graham crackers with a piece of chocolate.
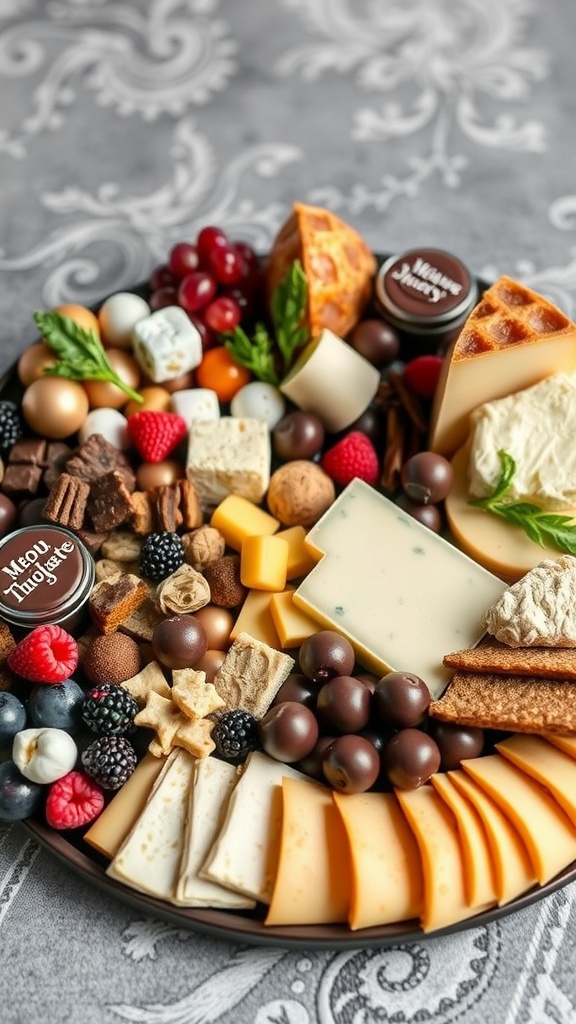
Savory and Sweet Combo Board
Combining savory and sweet flavors on a charcuterie board is a delightful way to elevate any gathering, be it a casual movie night or a festive charcuterie party. The interplay of rich cheeses, decadent chocolates, fresh fruits, and crunchy snacks creates a balance that invites everyone to indulge. It’s a simple and fun way to cater to varied tastes, making it a hit for gatherings of all kinds.
This board is not just a treat for the taste buds; it’s also a feast for the eyes. The vibrant colors and diverse textures will have your guests picking at the board throughout the night. Plus, assembling it is a breeze! Just gather your favorite components and arrange them artfully for a stunning presentation.
Ingredients
- 1 cup assorted cheeses (cheddar, brie, blue cheese)
- 1 cup mixed chocolates (dark, milk, and white)
- 1 cup fresh fruits (grapes, raspberries, blackberries)
- 1 cup assorted nuts (almonds, walnuts)
- 1 cup crackers or cookies
- 1/2 cup honey or chocolate sauce for drizzling
- Fresh herbs for garnish (like mint or basil)
Instructions
- Prepare the Base: Start by choosing a large wooden board or platter as your base. This will be the canvas for your savory and sweet combo.
- Arrange the Cheese: Cut cheeses into various shapes and sizes, and place them around the board, leaving some space in between.
- Add the Chocolates: Scatter your assorted chocolates among the cheeses, making sure to mix up the types for variety.
- Incorporate the Fruits: Fill in gaps with fresh fruits, creating clusters for visual appeal.
- Add Nuts and Snacks: Nestle the nuts and crackers or cookies around the board to fill in any empty spots.
- Garnish and Serve: Drizzle honey or chocolate sauce over selected spots for a finishing touch. Add a few sprigs of fresh herbs for decoration, and your savory and sweet combo board is ready to impress!
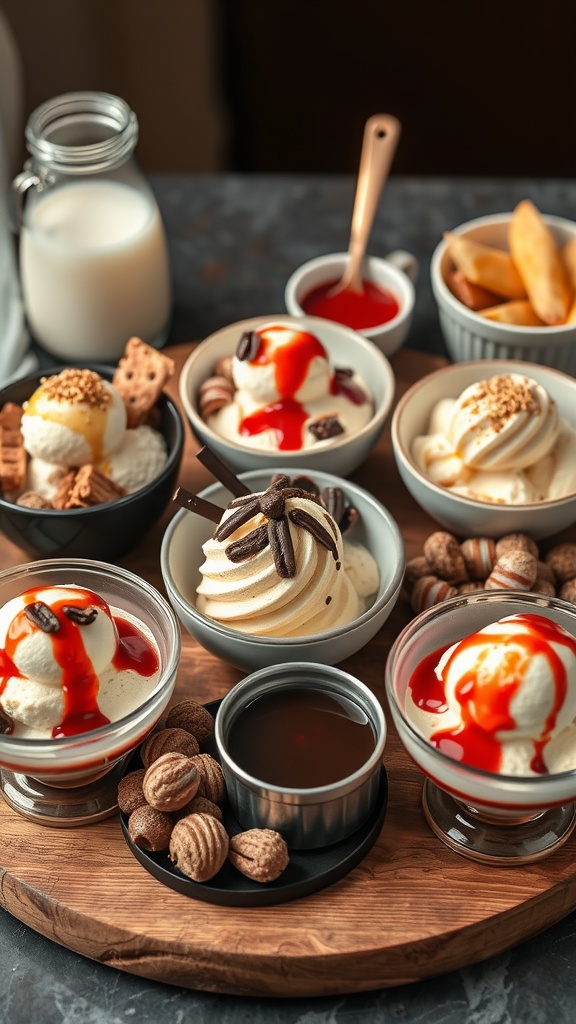
Ice Cream Sundae Station
Setting up an Ice Cream Sundae Station is a delightful way to elevate your dessert game, especially for a fun Movie Night Charcuterie or any Charcuterie Party. The combination of creamy ice cream, a variety of toppings, and delicious sauces creates a treat that everyone will enjoy. It’s simple to make and allows guests to customize their sundaes exactly how they like them, making it a hit at gatherings.
This sweet station can feature flavors from classic vanilla to decadent chocolate, and toppings like sprinkles, crushed cookies, and fruit add an exciting touch. It’s a fantastic way to bring a board of sweet treats to your next get-together!
Ingredients
- 4 cups of vanilla ice cream
- 2 cups of chocolate ice cream
- 1 cup of strawberry ice cream
- 1 cup of whipped cream
- 1/2 cup of chocolate syrup
- 1/2 cup of caramel sauce
- 1/2 cup of crushed nuts
- 1/2 cup of sprinkles
- 1/2 cup of crushed cookies (like Oreos)
- 1/2 cup of maraschino cherries
- Chocolate shavings, for garnish
Instructions
- Set up a table with bowls of different ice cream flavors, allowing guests to choose their base.
- Place toppings in small bowls for easy access. Arrange syrups and sauces in squeeze bottles or small containers.
- Encourage guests to create their custom sundaes by layering ice cream and adding their favorite toppings and sauces.
- Finish with a dollop of whipped cream and a cherry on top for the classic sundae look.
- Enjoy your sweet creations while watching your favorite movie!
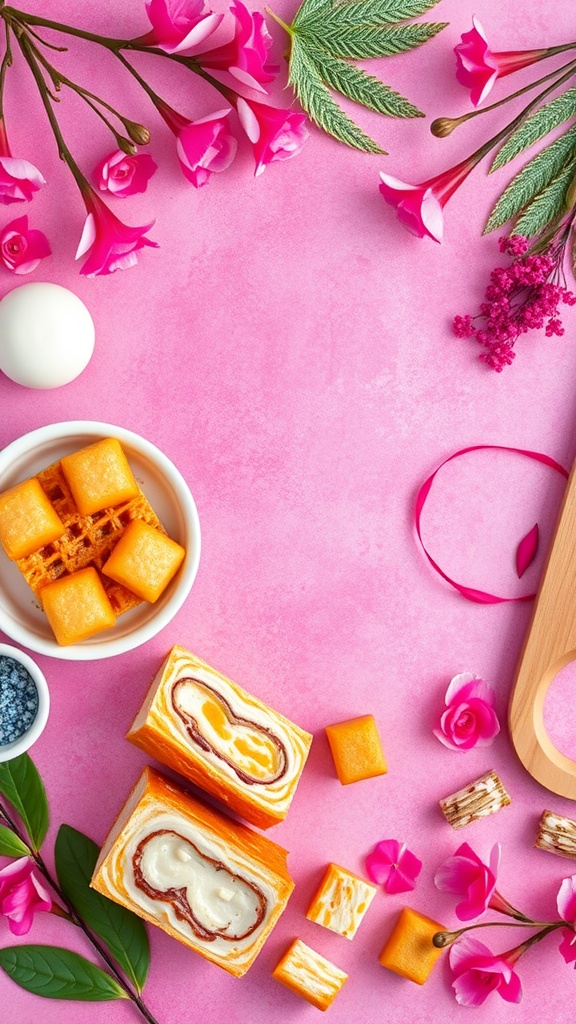
Exotic Dessert Board
Creating an exotic dessert board is a delightful way to explore flavors from around the world. This board can include a variety of intriguing sweets, from flavorful mochi and rich coconut candies to colorful jellies and tropical fruits. Each bite offers a unique taste experience that can transport you to far-off places, making it a fun addition to any gathering or special occasion.
This dessert board is easy to assemble and can be customized to suit your preferences. It’s perfect for entertaining guests during a charcuterie party or enjoying on a cozy movie night with friends. Just gather your favorite exotic treats and arrange them beautifully on a board for an eye-catching display that everyone will love.
Ingredients
- 1 cup assorted tropical fruits (mango, dragon fruit, pineapple)
- 1 cup colorful mochi (various flavors)
- 1 cup coconut candies
- 1 cup jelly cubes (different flavors)
- 1/2 cup chocolate-covered rice cakes
- Edible flowers for garnish
- Fresh mint leaves for garnish
Instructions
- Prepare the Board: Start with a large wooden or slate board as your base.
- Arrange the Fruits: Cut the tropical fruits into bite-sized pieces and place them around the board.
- Add the Mochi: Scatter the assorted mochi in various spots for a pop of color and texture.
- Place the Candies: Position the coconut candies and jelly cubes in small clusters for easy grabbing.
- Include Chocolate Treats: Add the chocolate-covered rice cakes to enhance the flavor profile.
- Garnish: Finish off the board with edible flowers and fresh mint leaves for a vibrant touch.
- Serve: Invite your guests to enjoy the exotic dessert board while relaxing over movie night snacks or charcuterie ideas.
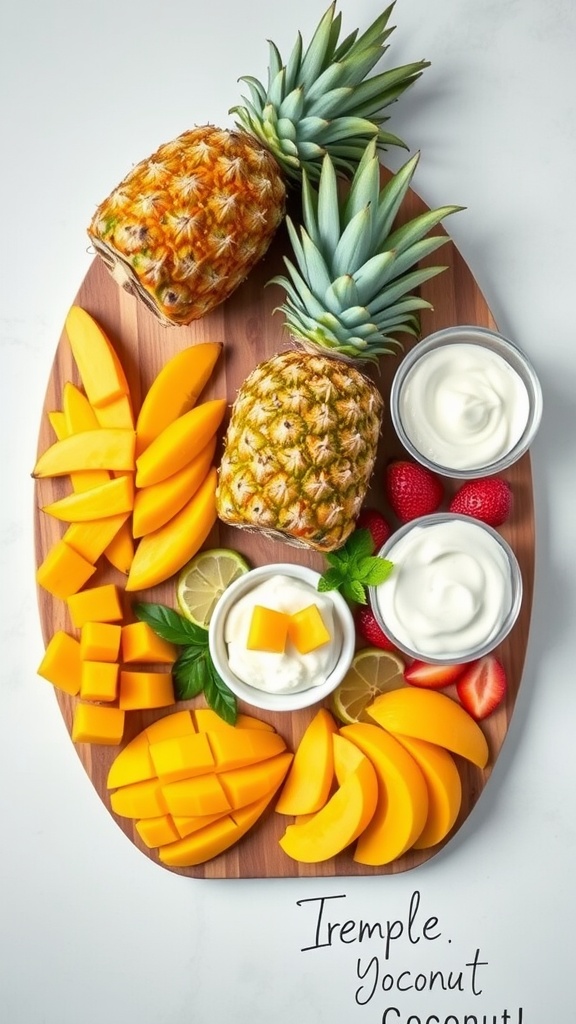
Tropical Fruit and Dip Board
Brighten up any gathering with a Tropical Fruit and Dip Board! This delightful recipe is not just about tasty fruit, but also fun dips that make snacking a breeze. With fresh mangoes, juicy strawberries, and sweet pineapples, this board offers a refreshing taste of the tropics. Plus, it’s super simple to assemble, making it a go-to for your next charcuterie party or movie night snacks.
The combination of vibrant fruits paired with creamy dips creates a delightful contrast that will impress your guests. Whether you’re hosting a casual board night or simply want to treat yourself, this tropical setup is sure to be a hit. You can even customize the dips to match your preference. Let’s get to it!
Ingredients
- 2 ripe mangoes, sliced
- 1 pineapple, cut into chunks
- 1 cup strawberries, hulled
- 1 cup coconut yogurt (or any yogurt of choice)
- 1/2 cup honey
- 1 lime, sliced
- Fresh mint leaves for garnish
Instructions
- Prepare the fruit by slicing the mangoes, cutting the pineapple into chunks, and hulling the strawberries.
- Arrange the sliced fruits on a large wooden board in an aesthetically pleasing manner.
- In small bowls, combine coconut yogurt and honey to create a simple dip. You can also serve yogurt plain or add lime zest for extra flavor.
- Garnish the board with lime slices and fresh mint leaves for a touch of color and freshness.
- Serve immediately and enjoy your tropical snack board during movie night or any gathering!
Decadent Chocolate Lovers Board
The Decadent Chocolate Lovers Board is a delightful way to satisfy your sweet tooth. This board is packed with an assortment of chocolates, from rich truffles to creamy chocolate-covered fruits. It’s a simple yet indulgent treat that’s perfect for any occasion, whether you’re hosting a charcuterie party or enjoying movie night snacks with friends.
This dessert board not only looks visually appealing but also offers a variety of flavors and textures, making it an excellent choice for chocolate enthusiasts. It’s easy to assemble, allowing you to mix and match your favorite chocolate goodies. Elevate your next Board Night with this deliciously fun spread!
Ingredients
- 1 cup dark chocolate truffles
- 1 cup milk chocolate covered strawberries
- 1 cup assorted chocolate-covered nuts
- 1 cup white chocolate bark, broken into pieces
- 1 cup flavored chocolate bonbons
- 1 cup chocolate cookies
- Fresh mint leaves for garnish
Instructions
- Start by selecting a large platter or board to arrange your chocolates.
- Begin placing the dark chocolate truffles in one corner of the board.
- Add the milk chocolate covered strawberries next to the truffles for a fruity contrast.
- Fill in the spaces with assorted chocolate-covered nuts for a crunchy texture.
- Break the white chocolate bark into pieces and scatter them around the board.
- Include the flavored chocolate bonbons and chocolate cookies in various sections for visual appeal.
- Finish by adding fresh mint leaves throughout the board for a pop of color and freshness.
Retro Candy Board
Creating a Retro Candy Board is a delightful way to bring nostalgia and sweetness to any gathering. This colorful assortment of classic candies evokes memories of childhood treats, making it perfect for all ages. With a variety of flavors and textures, from chewy gummies to crunchy sweets, every bite is a trip down memory lane.
Not only is this board visually appealing, but it’s also simple to assemble. Just gather your favorite retro candies, arrange them on a board, and get ready for compliments. It’s an excellent addition to movie night snacks or a fun centerpiece for a charcuterie party!
Ingredients
- 2 cups assorted gummy candies (like gummy bears, sour worms, etc.)
- 1 cup chocolate-covered treats (like chocolate-covered pretzels or raisins)
- 1 cup classic hard candies (like butterscotch or root beer barrels)
- 1 cup licorice (red and black)
- 1 cup wafer cookies (like vanilla or chocolate)
- 1 cup retro candy bars (like Charleston Chew or Mars Bar)
- 1 cup candy-coated chocolates (like M&M’s or Skittles)
Instructions
- Select a large wooden or ceramic board as your base.
- Start by placing the larger items, such as candy bars and wafers, around the board.
- Fill in the gaps with gummy candies, chocolate treats, and hard candies, creating a colorful display.
- For a fun touch, add small bowls for loose candies or chocolates to keep things organized.
- Once arranged to your liking, serve it up for everyone to enjoy!
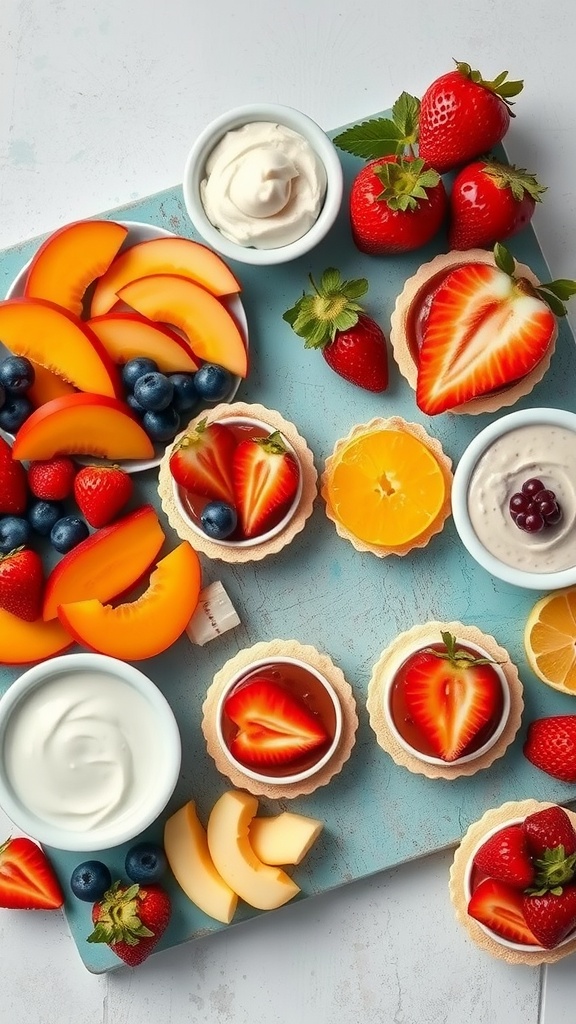
Fruity Delight Board
If you’re looking for a fun and refreshing dessert option, a Fruity Delight Board is the way to go! This vibrant spread is perfect for any occasion, from a casual get-together to a special celebration. The combination of fresh fruits and sweet toppings creates a delightful mix of flavors that everyone will enjoy. Plus, it’s incredibly easy to assemble, making it a great choice for a quick dessert fix.
This board not only looks inviting but also allows guests to customize their own treats. Picture a variety of fruits, along with creamy dips and crunchy components. It’s an ideal setup for a charcuterie party or as a centerpiece for movie night snacks. Gather your favorite fruits and let your creativity shine as you bring a board that’s sure to impress!
Ingredients
- 2 cups strawberries, sliced
- 1 cup blueberries
- 1 cup peaches, sliced
- 1 cup diced melon
- 1 cup small tart shells or mini cookie cups
- 1 cup whipped cream or vanilla yogurt
- 1/2 cup chocolate sauce
- 1/2 cup fruit preserves (like strawberry or apricot)
- Fresh mint leaves for garnish (optional)
Instructions
- Prepare the Fruits: Wash and slice the strawberries, peaches, and melon. Arrange them beautifully on a large platter.
- Fill the Tart Shells: Spoon whipped cream or yogurt into the tart shells, filling each about halfway.
- Top with Toppings: Drizzle some chocolate sauce over a few shells and add fruit preserves to others. Decorate with fresh fruit slices on top.
- Garnish: Add fresh mint leaves for a pop of color and freshness.
- Serve: Present the Fruity Delight Board to your guests and let them indulge in creating their own fruity treats!
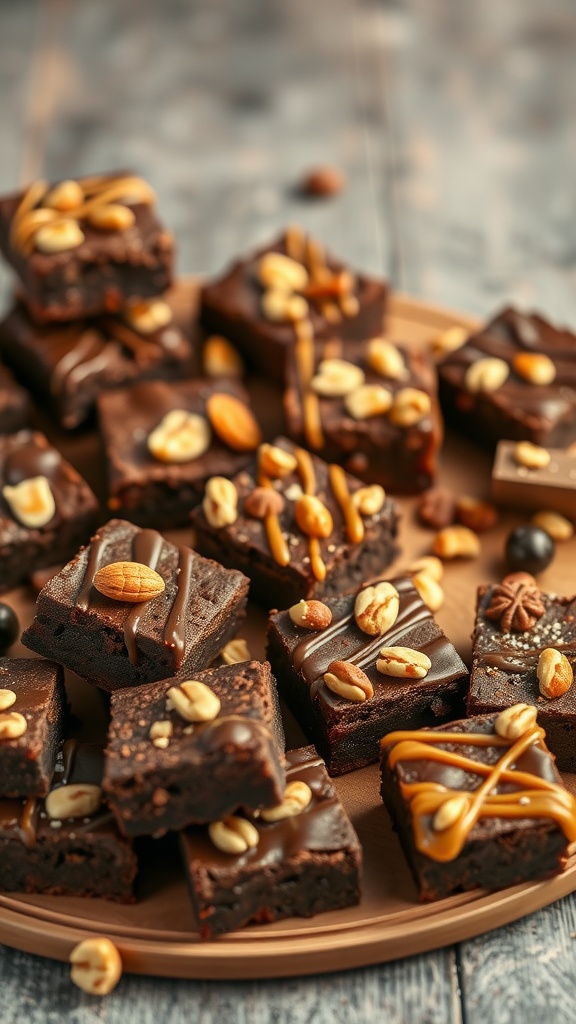
Decadent Brownie Spread
If you’re looking for a sweet addition to your next charcuterie party, a decadent brownie spread is the way to go. Rich, fudgy brownies topped with various delicious elements create a treat that’s both visually appealing and utterly satisfying. This recipe is simple and fun, making it a perfect choice for movie night snacks!
The brownie spread is not only tasty but also allows you to get creative with toppings. You can mix and match flavors like caramel, nuts, and chocolate drizzle to cater to everyone’s preferences. It’s an enjoyable shareable dessert that brings everyone together for a delightful end to your meal—or a fun centerpiece for your movie night charcuterie board!
Ingredients
- 1 cup unsalted butter
- 2 cups granulated sugar
- 4 large eggs
- 2 teaspoons vanilla extract
- 1 cup all-purpose flour
- 1 cup unsweetened cocoa powder
- 1 teaspoon baking powder
- 1/2 teaspoon salt
- 1 cup chocolate chips
- 1/2 cup chopped nuts (optional)
- Caramel sauce for drizzling
- Chocolate syrup for drizzling
Instructions
- Preheat your oven to 350°F (175°C). Grease a 9×13 inch baking pan.
- In a medium saucepan, melt the butter over low heat. Remove from heat and stir in sugar, eggs, and vanilla until smooth.
- Add flour, cocoa powder, baking powder, and salt to the mixture. Stir until just combined. Fold in chocolate chips and nuts if using.
- Pour the batter into the prepared baking pan and spread evenly. Bake for 25-30 minutes, or until a toothpick comes out with a few moist crumbs.
- Let the brownies cool completely in the pan. Once cooled, cut into squares and drizzle with caramel and chocolate syrup before serving. Enjoy your delicious brownie spread at your next board night!
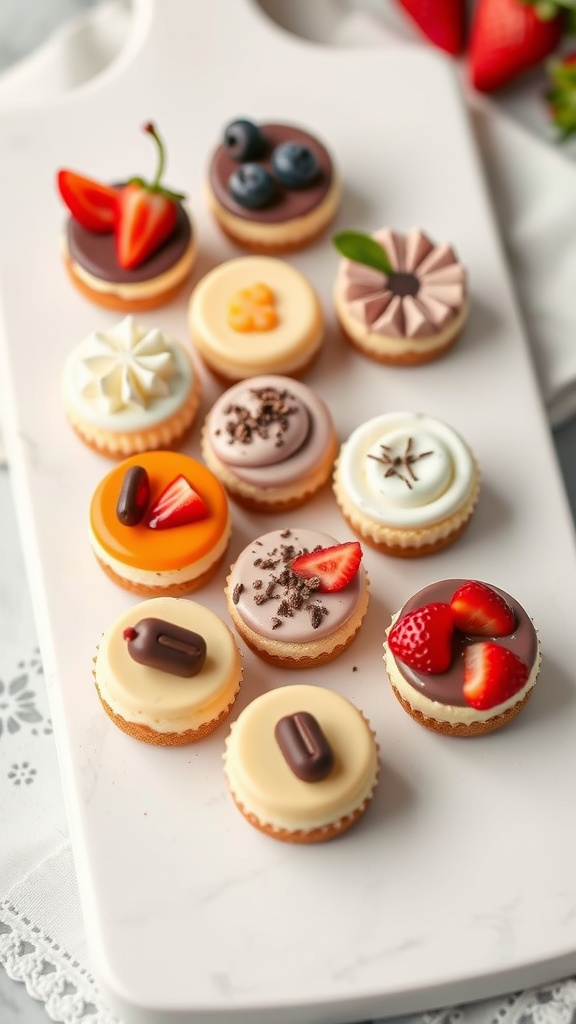
Cheesecake Bites Bonanza
Cheesecake bites are delightful little treats that pack all the creamy goodness of traditional cheesecake into a manageable, poppable size. They’re perfect for satisfying your sweet tooth without the need to commit to a whole slice. With a variety of toppings, these bites can cater to everyone’s taste, making them a fun addition to any charcuterie party or movie night snacks.
These bites are not only easy to make but also provide a lovely visual appeal when arranged on a dessert charcuterie board. Mix and match flavors like chocolate, fruit, and vanilla to create a colorful spread that will impress your guests. Plus, they’re a great way to Bring A Board to your next gathering!
Ingredients
- 1 cup cream cheese, softened
- 1/2 cup powdered sugar
- 1 teaspoon vanilla extract
- 1/2 cup heavy cream
- 1 cup graham cracker crumbs
- 2 tablespoons melted butter
- Assorted toppings (fresh fruit, chocolate ganache, nuts, etc.)
Instructions
- Prepare the Crust: In a bowl, mix graham cracker crumbs with melted butter. Press the mixture into the bottom of mini muffin tins to form a crust and set aside.
- Make the Cheesecake Filling: In a separate bowl, beat the cream cheese until smooth. Add powdered sugar and vanilla, mixing until well combined. In another bowl, whip the heavy cream until soft peaks form, then gently fold it into the cream cheese mixture.
- Fill the Cups: Spoon the cheesecake filling into the prepared crusts, smoothing the top with a spatula.
- Add Toppings: Decorate each cheesecake bite with your choice of toppings, like fresh fruit or a drizzle of chocolate ganache.
- Chill: Refrigerate the cheesecake bites for at least 2 hours before serving, allowing them to set properly.
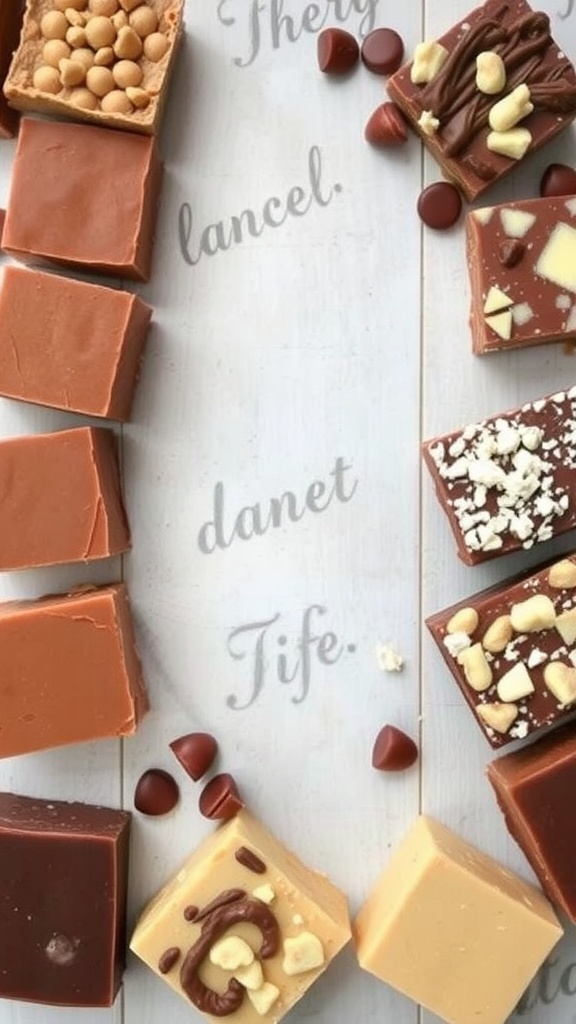
Homemade Fudge Selection
Homemade fudge is a delightful addition to any dessert charcuterie board. Rich, creamy, and utterly satisfying, fudge comes in a variety of flavors, making it a versatile treat for all tastes. Whether you prefer classic chocolate, peanut butter, or something more adventurous like maple or cookies and cream, there’s a fudge recipe for everyone.
This treat is simple to make and perfect for sharing during movie night snacks or any gathering. Serve it in bite-sized pieces on your board for easy snacking, and you’ll have everyone reaching for more. It’s a sweet way to elevate your charcuterie ideas and impress your guests at your next Board Night.
Ingredients
- 2 cups granulated sugar
- 1/2 cup unsweetened cocoa powder
- 1/2 cup milk
- 1/4 cup unsalted butter
- 1 teaspoon vanilla extract
- 1/2 cup chocolate chips (optional)
- 1/2 cup chopped nuts (optional)
Instructions
- Prepare the Mixture: In a medium saucepan, combine sugar, cocoa powder, and milk. Stir until smooth and bring to a gentle boil over medium heat.
- Cook the Fudge: Allow the mixture to boil for about 5 minutes, stirring constantly. Remove from heat and add the butter and vanilla extract, mixing until smooth.
- Add Extras: If desired, fold in chocolate chips and nuts for added texture and flavor.
- Set the Fudge: Pour the mixture into a greased 8-inch square baking dish. Let it cool at room temperature for about 2 hours or until set.
- Cut and Serve: Once set, cut the fudge into small squares and arrange them on your charcuterie board. Enjoy your delicious homemade fudge!
Cinnamon Roll Delight
Cinnamon Roll Delight brings a touch of warmth and sweetness that is hard to resist. These soft, fluffy rolls are swirled with cinnamon and topped with a creamy frosting, making them an ideal addition to any dessert charcuterie board. They’re perfect for sharing during cozy movie nights or as a delightful treat for a charcuterie party.
This recipe is simple to follow, ensuring you can whip up these delicious rolls even on a busy day. With just a bit of prep and baking time, you’ll have a crowd-pleasing dessert that beautifully complements your snack boards.
Ingredients
- 4 cups all-purpose flour
- 1/4 cup granulated sugar
- 2 1/4 teaspoons active dry yeast
- 1 teaspoon salt
- 1/4 cup unsalted butter, melted
- 1 cup milk, warmed
- 2 large eggs
- 1/2 cup brown sugar, packed
- 2 tablespoons ground cinnamon
- 1/4 teaspoon ground nutmeg
- 1/4 cup unsalted butter, softened
- 1 cup cream cheese, softened
- 2 cups powdered sugar
- 1 teaspoon vanilla extract
Instructions
- Prepare the Dough: In a large bowl, combine warmed milk, sugar, and yeast. Let it sit for about 5 minutes until foamy. Stir in melted butter, eggs, and salt. Gradually add flour, mixing until a soft dough forms.
- Knead the Dough: Turn the dough onto a floured surface and knead for about 5-7 minutes until smooth and elastic. Place in a greased bowl, cover, and let rise in a warm place until doubled in size, about 1 hour.
- Make the Filling: In a small bowl, mix brown sugar, cinnamon, and nutmeg. Roll out the dough into a rectangle, spread softened butter over the surface, and sprinkle the cinnamon mixture evenly. Roll tightly and slice into individual rolls.
- Bake the Rolls: Place the rolls in a greased baking dish and let rise for another 30 minutes. Preheat the oven to 350°F (175°C). Bake for 25-30 minutes until golden brown.
- Prepare the Frosting: While the rolls are baking, beat together cream cheese, powdered sugar, and vanilla until smooth. Spread the frosting over warm rolls before serving.
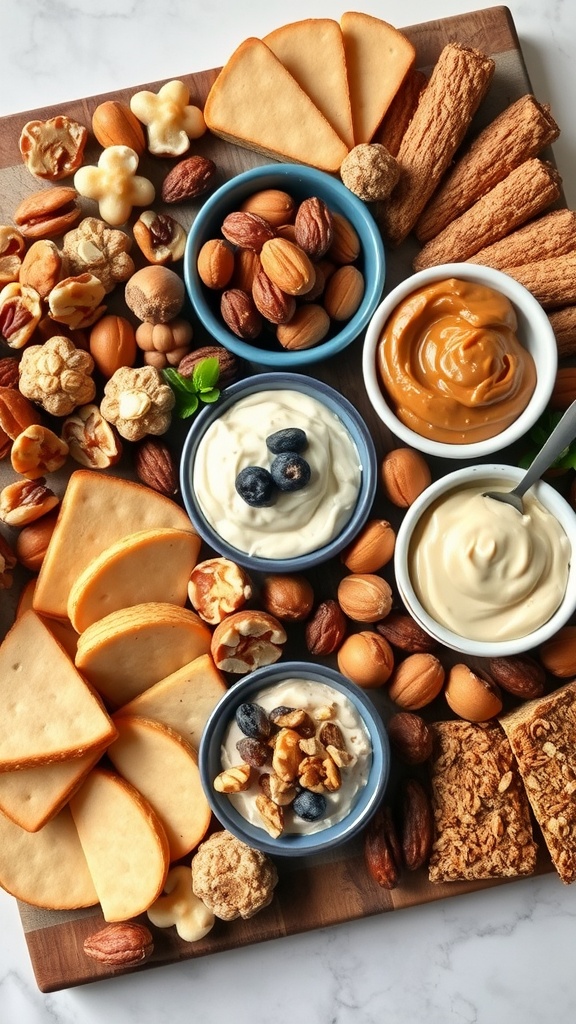
Nutty Dessert Board
Creating a nutty dessert board is a fun and tasty way to indulge your sweet tooth while enjoying a variety of textures and flavors. This board features a delightful mix of crunchy nuts, creamy dips, and sweet treats, making it perfect for casual gatherings or cozy movie nights. The balance of savory and sweet elements will please everyone, and it’s surprisingly easy to put together!
Whether you’re hosting a charcuterie party or just looking for a unique dessert idea, this nutty dessert board has you covered. It’s all about layering different snacks, so feel free to get creative with your choices. You can even prep it in advance for your next movie night, ensuring you have the perfect movie night snacks ready to go!
Ingredients
- 1 cup almonds
- 1 cup mixed nuts (walnuts, pecans, hazelnuts)
- 1 cup chocolate-covered pretzels
- 1 cup popcorn (caramel or cheese)
- 1 cup fruit (dried cranberries or blueberries)
- 1 cup yogurt (plain or flavored)
- 1/2 cup peanut butter or nut butter of choice
- Assorted cookies (like graham crackers or vanilla wafers)
Instructions
- Prepare the Nuts: Arrange the almonds and mixed nuts in small bowls or directly on the board. This adds a great crunchy component.
- Include Sweet Treats: Scatter chocolate-covered pretzels and popcorn around the nuts for a fun, sweet touch.
- Add Dried Fruit: Place bowls of dried cranberries or blueberries for a fruity flavor that complements the nuts.
- Set up Dips: Add yogurt and your favorite nut butter in small bowls. These can be used for dipping fruits, cookies, or even nuts!
- Finish with Cookies: Lay out an assortment of cookies around the board for a delightful final touch.
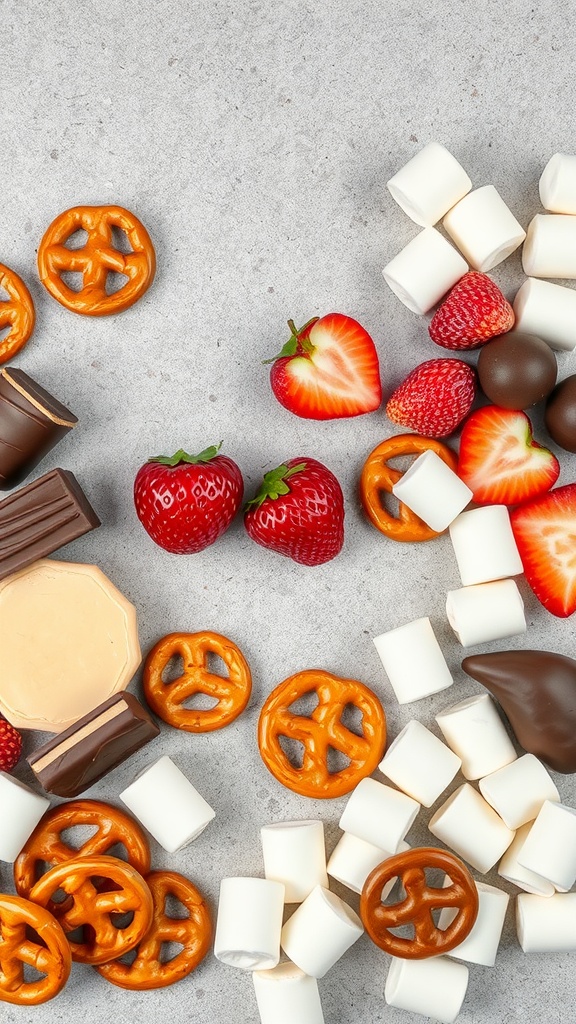
Chocolate-Dipped Treats Board
Creating a Chocolate-Dipped Treats Board is not only a fun way to indulge in sweets, but it also makes for an eye-catching addition to any gathering. This board is filled with a variety of treats, each waiting to be dipped in rich, melted chocolate. The contrasting flavors of sweet and salty come together perfectly, making it a delightful option for movie night snacks or any charcuterie party.
With simple ingredients and minimal effort, you can assemble a beautiful spread that’s sure to be a hit. Whether you’re planning a cozy night in or hosting friends for a Board Night, this treat board is a sweet way to satisfy your cravings. Let’s dive into how to create this delicious chocolate-dipped experience!
Ingredients
- 1 cup dark chocolate chips
- 1 cup milk chocolate chips
- 1 cup white chocolate chips
- Fresh strawberries
- Mini pretzels
- Marshmallows
- Chocolate-covered treats (like almonds or Oreos)
- Optional toppings: crushed nuts, sprinkles, or shredded coconut
Instructions
- Melt the Chocolate: In separate microwave-safe bowls, melt the dark, milk, and white chocolate chips. Heat in 30-second intervals, stirring in between until smooth.
- Prepare the Treats: Rinse and dry the strawberries. Arrange the pretzels, marshmallows, and chocolate-covered treats on a large platter.
- Dip and Decorate: Dip each treat into the melted chocolate, then sprinkle with optional toppings if desired. Place the dipped treats on parchment paper to set.
- Assemble the Board: Once the chocolate has set, arrange the treats on a board or platter, mixing colors and textures for visual appeal.
- Serve and Enjoy: Serve your Chocolate-Dipped Treats Board with skewers or toothpicks for easy dipping and enjoy with friends and family!
Flavored Popcorn Paradise
Flavored popcorn is a delightful addition to any Movie Night Charcuterie Board. With its light, airy texture and endless flavor possibilities, it makes for an irresistible snack. Whether you’re craving something sweet or savory, this recipe is simple and quick to whip up. You can customize your popcorn with various toppings, making it perfect for any occasion.
Imagine cozying up for a movie night with bowls filled with colorful, flavored popcorn that not only pleases the taste buds but also adds a fun visual element to your snack board. This popcorn paradise will surely be a hit at your next charcuterie party!
Ingredients
- 1/2 cup popcorn kernels
- 1/4 cup butter, melted
- 1/4 cup sugar
- 1/4 teaspoon salt
- 1 teaspoon vanilla extract (for sweet popcorn)
- 1/2 teaspoon cheese powder (for savory popcorn)
- Food coloring (optional)
- Various toppings (candy pieces, sprinkles, nuts, etc.)
Instructions
- Pop the Corn: In a large pot, heat the popcorn kernels over medium heat, shaking the pot occasionally. Once popping slows down, remove from heat.
- Mix the Flavor: In a separate bowl, combine melted butter, sugar, and vanilla extract for sweet popcorn, or cheese powder for savory popcorn.
- Combine: Pour the flavor mixture over the popped corn and toss until evenly coated. If using food coloring, add it now and mix to distribute the color.
- Add Toppings: Sprinkle your choice of toppings over the coated popcorn to enhance its flavor and presentation.
- Serve: Transfer the flavored popcorn to serving bowls and enjoy as part of your Movie Night Snacks!
Rice Crispy Treats Extravaganza
Rice crispy treats are a delightful and nostalgic snack that brings a smile to anyone’s face. With their chewy texture and sweet marshmallow flavor, they are perfect for a fun dessert charcuterie board. Plus, they are incredibly simple to make, making them a go-to option for any gathering, whether it’s a casual movie night or a charcuterie party.
You can easily customize these treats with different add-ins and toppings to suit any theme or occasion. From colorful sprinkles for a festive touch to layers of chocolate and peanut butter, the possibilities are endless. They make an excellent addition to snack boards and pair perfectly with other sweet treats for a delicious movie night food spread.
Ingredients
- 6 cups rice cereal
- 4 cups mini marshmallows
- 3 tablespoons unsalted butter
- 1 teaspoon vanilla extract
- 1/2 cup chocolate chips (optional)
- 1/2 cup colorful sprinkles (optional)
Instructions
- Melt the Butter: In a large saucepan over low heat, melt the butter. Once melted, add the mini marshmallows and stir until completely melted and smooth.
- Add Cereal: Remove the saucepan from heat and add the rice cereal, stirring gently until fully coated with the marshmallow mixture.
- Mix in Extras: If using chocolate chips or sprinkles, fold them into the mixture until evenly distributed.
- Shape the Treats: Press the mixture into a greased 9×13 inch pan. Use a spatula or your hands (dampened to prevent sticking) to flatten it evenly.
- Cool and Cut: Allow the treats to cool completely before cutting them into squares or fun shapes. Serve on your dessert charcuterie board alongside other sweet snacks for a delightful movie night snacks experience.
Elegant Macaron Display
Creating an elegant macaron display is a delightful way to elevate your dessert charcuterie board. These colorful French treats are not only visually appealing but also offer a satisfying crunch paired with a creamy filling. With flavors ranging from classic vanilla and chocolate to adventurous lavender or pistachio, macarons can cater to various tastes and preferences.
Making macarons can seem tricky, but with a bit of practice, you’ll find it to be a fun and rewarding experience. These delicate cookies are perfect for any occasion, whether it’s a charcuterie party or a cozy movie night. They can be made in advance, allowing you to focus on your other Movie Night Snacks while still impressing your guests.
Ingredients
- 1 cup almond flour
- 1 3/4 cups powdered sugar
- 3 large egg whites
- 1/4 cup granulated sugar
- 1/2 teaspoon vanilla extract
- Food coloring (optional)
- 1 cup butter, softened
- 2 cups powdered sugar (for filling)
- 1 teaspoon vanilla extract (for filling)
Instructions
- Prepare the Dry Ingredients: In a bowl, sift together almond flour and powdered sugar to remove any lumps.
- Whip the Egg Whites: In a separate bowl, beat egg whites until they form soft peaks. Gradually add granulated sugar and continue to whip until stiff peaks form. Add vanilla extract and food coloring, if desired, and mix gently.
- Combine Mixtures: Fold the dry ingredients into the egg whites in two batches, being careful not to deflate the mixture. The batter should flow like lava.
- Pipe the Macarons: Transfer the batter to a piping bag and pipe small circles onto a baking sheet lined with parchment paper. Let them sit for about 30 minutes until a skin forms.
- Bake: Preheat the oven to 300°F (150°C) and bake the macarons for 15-20 minutes. Let them cool completely before removing from the parchment.
- Make the Filling: In a mixing bowl, beat softened butter and powdered sugar until smooth, then add vanilla extract.
- Assemble: Pair similar-sized macarons and pipe the filling onto one half before sandwiching them together.
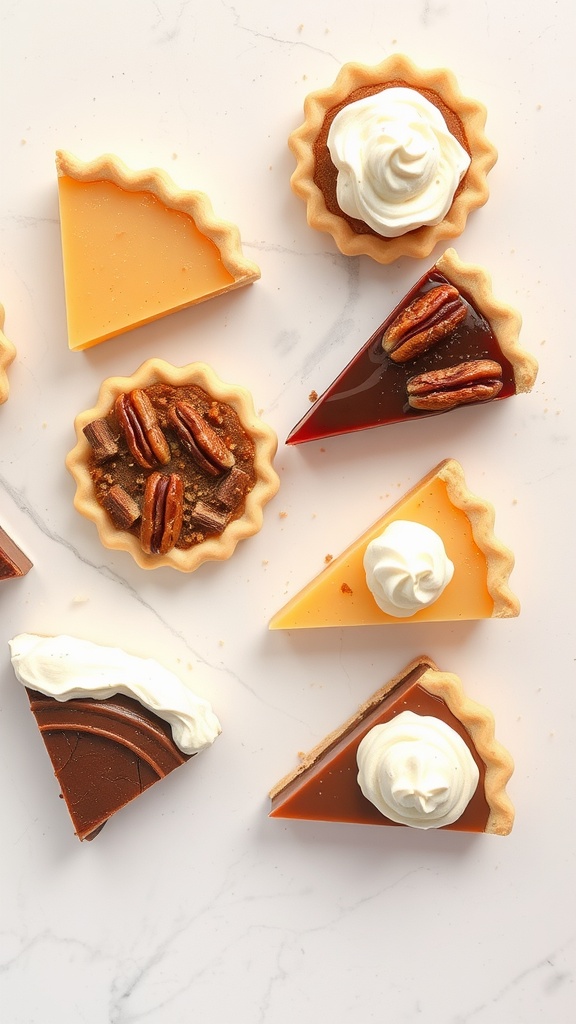
Pie Slice Sampler
Elevate your dessert game with a delightful Pie Slice Sampler that’s perfect for any gathering. This charming charcuterie idea offers a variety of pie flavors in bite-sized pieces, making it an excellent choice for snack boards or movie night food. Each slice is a mini indulgence, balancing sweet and creamy textures with a buttery crust that everyone loves.
Not only is this pie slice sampler simple to create, but it also allows for creativity. Mix and match flavors like chocolate, pumpkin, and pecan to cater to different tastes. It’s a fun way to bring a board to your table, and guests can sample multiple flavors without committing to a whole slice. Perfect for a charcuterie party or Board Night, this dessert will surely be a hit!
Ingredients
- 1 pre-made pie crust
- 1 cup chocolate pudding
- 1 cup pumpkin puree
- 1 cup pecan pie filling
- 1/2 cup whipped cream (for topping)
- 1/4 cup caramel sauce
- Nutmeg and cinnamon (for garnish)
Instructions
- Preheat your oven according to the pie crust instructions. Roll out the pie crust and cut it into smaller rounds.
- Fit each round into a muffin tin, creating mini pie shells. Bake according to the crust’s package instructions until golden brown.
- Once cooled, fill each shell with a different filling: chocolate pudding, pumpkin puree, or pecan pie filling.
- Top each mini pie with a dollop of whipped cream and drizzle with caramel sauce. Sprinkle with nutmeg and cinnamon for extra flavor.
- Arrange the pie slices on a platter, showcasing the variety, and serve. Enjoy your dessert sampler!
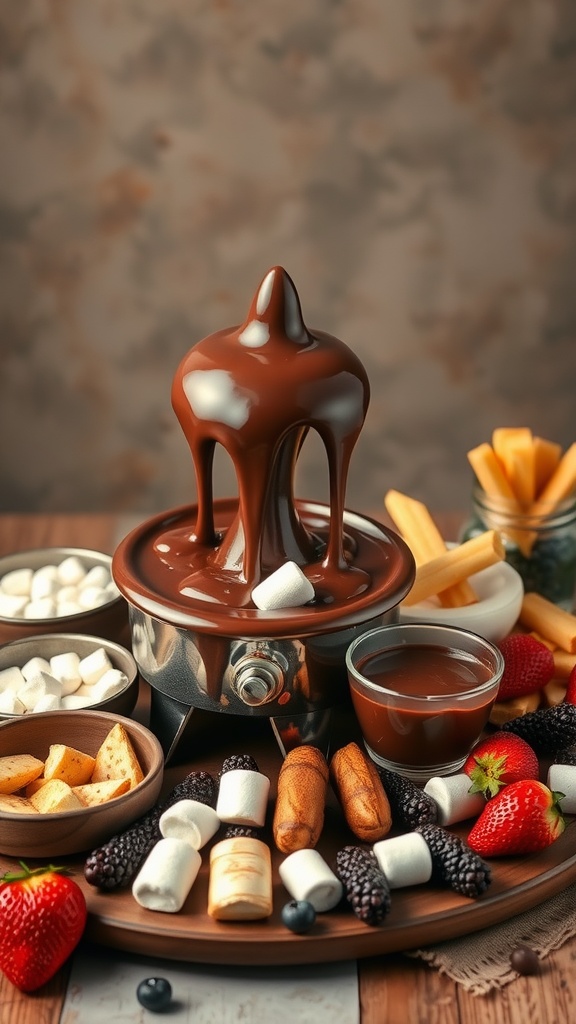
Luxury Chocolate Fondue Station
Indulging in a chocolate fondue station is a delightful way to elevate any gathering, especially for a cozy movie night at home. This interactive dessert option invites everyone to dip their favorite treats into warm, melted chocolate, creating a fun and sweet experience. Simple to prepare, it allows for creative combinations that can suit any palate.
With a variety of dippables like fruits, marshmallows, and cookies, you can craft your own unique flavor pairings while enjoying the rich, creamy chocolate. This is not just any dessert; it’s a centerpiece that adds excitement to your snack boards and makes it easy to cater to various tastes at a charcuterie party.
Ingredients
- 1 cup heavy cream
- 8 ounces semi-sweet chocolate, chopped
- 1 teaspoon vanilla extract
- Assorted dippables such as strawberries, bananas, marshmallows, pretzels, and pound cake
- Fresh fruits like blackberries and blueberries
- Skewers for dipping
Instructions
- Heat the cream: In a small saucepan over low heat, warm the heavy cream until it’s just about to simmer.
- Melt the chocolate: Remove the saucepan from the heat and add the chopped chocolate to the cream. Stir until fully melted and smooth. Add the vanilla extract and mix well.
- Setup the station: Pour the melted chocolate into a fondue pot or a heat-safe bowl. Arrange your assorted dippables around the chocolate.
- Enjoy: Use skewers to dip the treats into the warm chocolate and savor each bite. Keep the chocolate warm by using a low flame or a candle underneath the fondue pot if needed.
Gourmet Doughnut Board
Creating a gourmet doughnut board is a delightful way to elevate your next gathering or simply enjoy a fun treat at home. With an array of colorful and unique doughnut flavors, this board is both visually appealing and delicious. It’s as simple as picking your favorite doughnuts, arranging them on a platter, and adding some fun toppings and dips. Perfect for a charcuterie party or movie night snacks, this doughnut board is sure to impress!
You can mix and match flavors from classic glazed to funfetti, and even chocolate-covered options. Pair them with sweet dips like chocolate ganache or flavored cream cheese for an extra touch. This board is all about enjoying variety and creativity, so let your taste buds guide you!
Ingredients
- 12 assorted doughnuts (glazed, chocolate, sprinkles, etc.)
- 1 cup chocolate ganache
- 1 cup vanilla cream cheese dip
- 1/2 cup crushed nuts (e.g., peanuts, almonds)
- 1/2 cup shredded coconut
- 1/2 cup chocolate chips
- 1/4 cup colorful sprinkles
- Fresh fruit (e.g., strawberries, blueberries) for garnish
Instructions
- Prepare the Dips: In separate bowls, prepare chocolate ganache by melting chocolate chips with heavy cream. For vanilla cream cheese dip, mix softened cream cheese with powdered sugar and vanilla extract until smooth.
- Arrange the Doughnuts: On a large platter, arrange the assorted doughnuts in a circular or random pattern, ensuring a mix of colors and types.
- Add the Dips: Place the bowls of chocolate ganache and vanilla cream cheese dip in the center or around the platter for easy access.
- Sprinkle Toppings: Scatter the crushed nuts, shredded coconut, and colorful sprinkles around the doughnuts and dips for added texture and fun.
- Garnish: Add fresh fruit around the board for a pop of color and a refreshing touch.
- Serve and Enjoy: Gather friends and family to enjoy your gourmet doughnut board as a sweet ending to a charcuterie night or as a treat for movie night!
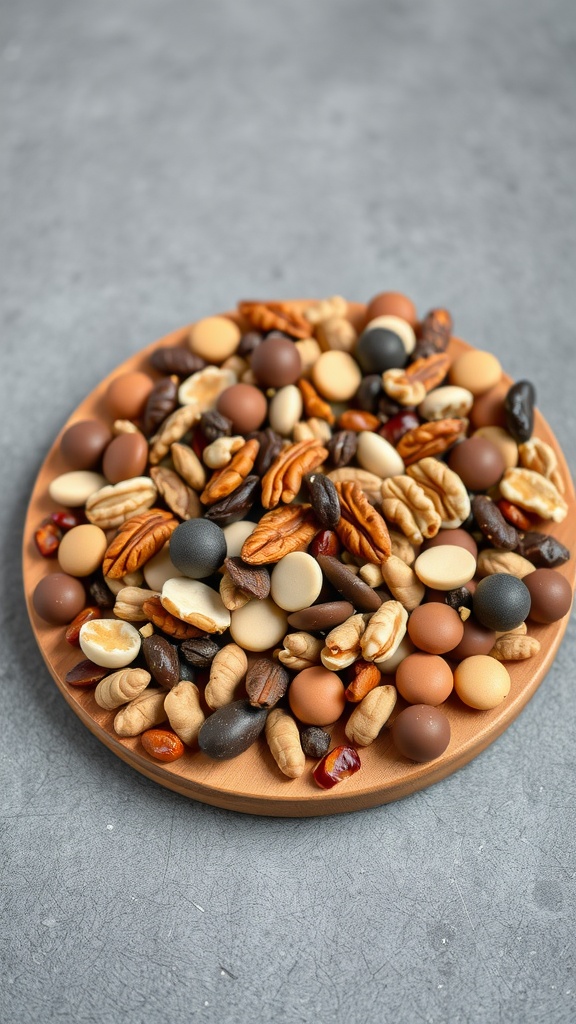
Savory-Sweet Trail Mix Board
Creating a savory-sweet trail mix board is a delightful way to combine flavors that your taste buds will love. This recipe offers a mix of textures and tastes, balancing the saltiness of nuts with the sweetness of chocolate and dried fruits. It’s an easy-to-make snack option perfect for any occasion, whether it’s a cozy movie night or a lively charcuterie party.
This fun mix is versatile; you can customize it with your favorite ingredients. With just a bit of creativity, you’ll have a colorful and appetizing board that invites everyone to dig in. It’s the ideal addition to your movie night snacks, giving everyone a chance to share and enjoy together.
Ingredients
- 1 cup mixed nuts (almonds, pecans, walnuts)
- 1/2 cup dark chocolate chips
- 1/2 cup yogurt-covered raisins
- 1/2 cup dried cranberries
- 1/2 cup pretzel pieces
- 1/4 cup sunflower seeds
- 1/4 cup coconut flakes
- 1 teaspoon sea salt (optional)
Instructions
- Combine Ingredients: In a large mixing bowl, combine all the nuts, chocolate chips, yogurt-covered raisins, dried cranberries, pretzel pieces, sunflower seeds, and coconut flakes.
- Toss and Mix: Gently toss the mixture until everything is evenly distributed. If desired, sprinkle sea salt on top for an extra burst of flavor.
- Serve: Arrange your trail mix on a large platter or board, making it visually appealing for your guests. You can use small bowls for individual servings or let everyone scoop their favorites directly from the board.
- Store: If you have any leftovers, store them in an airtight container for up to a week.


