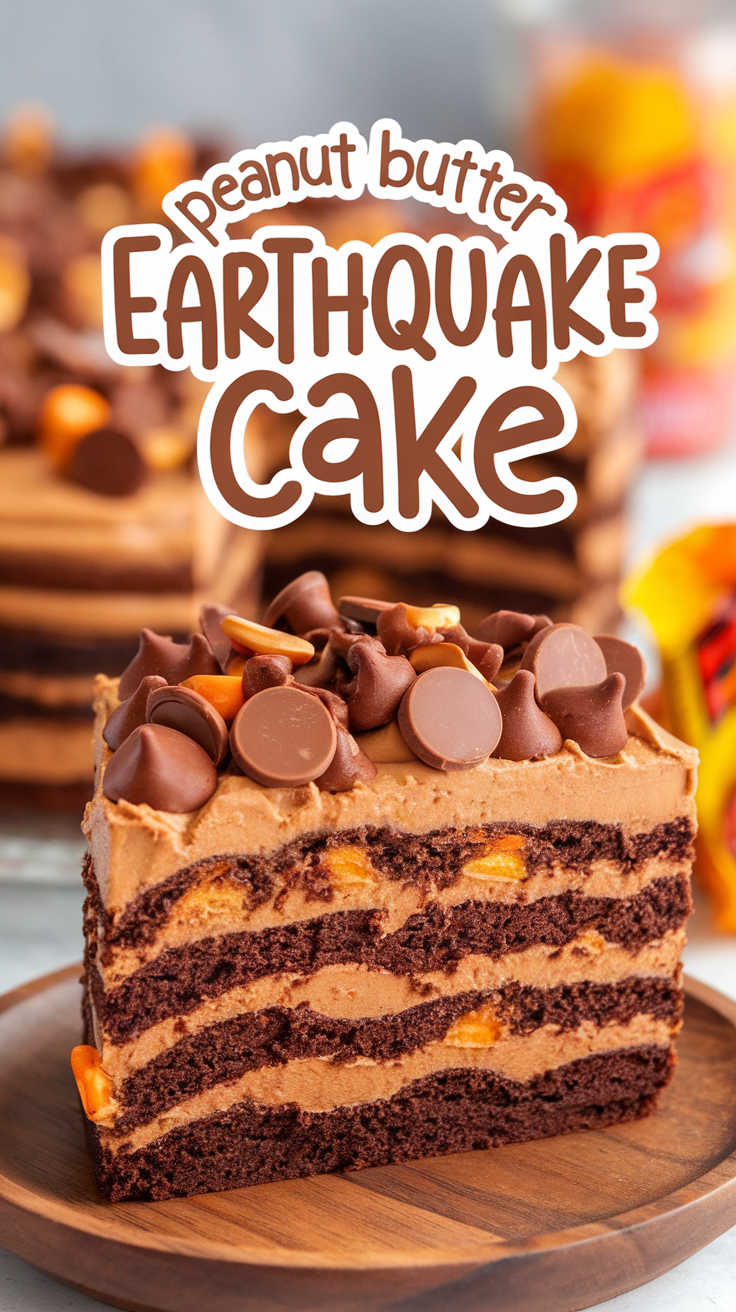
Imagine a dessert so indulgent that it practically erupts with flavor and texture. Meet the Peanut Butter Earthquake Cake, a recipe that takes a humble box of chocolate cake mix and transforms it into a dessert masterpiece. This cake combines layers of gooey peanut butter, melted chocolate, and creamy swirls to create a decadent, visually stunning dessert that lives up to its name—an “earthquake” of deliciousness!
If you’re a fan of Reese’s peanut butter cups, gooey butter cakes, or anything that involves chocolate and peanut butter, this recipe is guaranteed to become a favorite. Plus, it’s surprisingly easy to make, even for novice bakers, because it relies on a few store-bought ingredients.
In this article, we’ll explore the origins of the earthquake cake, dive into its unique preparation method, and share tips for nailing it every time. Whether you’re hosting a party or just craving something sweet, this cake is a showstopper.
The Story Behind Earthquake Cakes
The earthquake cake got its name from its iconic cracked and uneven surface, which forms as the batter bakes. As the cake rises, swirls of cream cheese, melted chocolate, and add-ins like peanut butter or candy create natural fault lines in the dessert. The result? A dessert that’s rustic, gooey, and utterly irresistible.
This recipe takes the concept a step further by introducing peanut butter into the mix. The classic pairing of chocolate and peanut butter creates a luxurious flavor profile that’s reminiscent of Reese’s peanut butter cups but with an elevated homemade touch.
What Makes This Cake Special?
- Box Cake Mix Magic
By starting with a box of chocolate cake mix, you cut down on prep time without sacrificing flavor. Add a few pantry staples and you’re halfway to dessert heaven. - Peanut Butter Swirls
A layer of peanut butter-flavored cream cheese creates pockets of rich, creamy goodness. This step elevates the cake from an ordinary dessert to something truly indulgent. - Loaded Toppings
Chocolate chips, chopped Reese’s peanut butter cups, or even Reese’s Pieces add texture and crunch to every bite. - Gooey Centers
The combination of cream cheese and butter ensures that the cake remains soft and gooey, even after baking.
How to Make Peanut Butter Earthquake Cake
Ingredients
For the cake base:
- 1 box of chocolate cake mix (plus ingredients listed on the box: eggs, oil, and water)
- 1 cup sweetened shredded coconut (optional)
- 1 cup chopped pecans or walnuts (optional)
For the peanut butter layer:
- 8 oz cream cheese, softened
- 1/2 cup creamy peanut butter
- 1/4 cup unsalted butter, softened
- 2 cups powdered sugar
- 1/4 teaspoon vanilla extract
For the toppings:
- 1 cup semi-sweet chocolate chips
- 1 cup chopped Reese’s peanut butter cups
- 1/2 cup Reese’s Pieces (optional)
Instructions
1. Prepare the Cake Base
Preheat your oven to 350°F (175°C). Grease a 9×13-inch baking dish and sprinkle the bottom with shredded coconut and chopped nuts (if using).
Prepare the chocolate cake mix according to the package instructions. Pour the batter over the coconut and nuts, spreading it evenly.
2. Make the Peanut Butter Layer
In a large mixing bowl, beat together the softened cream cheese, peanut butter, and butter until smooth. Gradually add powdered sugar, one cup at a time, mixing until creamy. Add vanilla extract and stir to combine.
Drop spoonfuls of the peanut butter mixture over the chocolate cake batter. Use a knife or spatula to swirl it into the batter.
3. Add Toppings
Sprinkle chocolate chips, chopped Reese’s peanut butter cups, and Reese’s Pieces evenly over the top of the cake.
4. Bake the Cake
Place the cake in the preheated oven and bake for 40-50 minutes, or until the edges are set and the center is slightly jiggly. The cake will have a cracked, uneven surface—this is exactly what you want!
5. Cool and Serve
Allow the cake to cool completely before slicing. Serve as-is, or add a dollop of whipped cream or a scoop of vanilla ice cream for extra indulgence.
Tips for Success
- Room-Temperature Ingredients: Make sure your cream cheese, butter, and eggs are at room temperature for smooth mixing.
- Don’t Overmix: Swirl the peanut butter layer gently to create marbled effects without fully combining the layers.
- Customize It: Not a fan of nuts? Skip them! Love caramel? Drizzle some caramel sauce on top before baking.
- Storage: Store leftovers in an airtight container in the refrigerator for up to five days. This cake also freezes well—just wrap individual slices tightly in plastic wrap.
Variations to Try
- Caramel Earthquake Cake: Swap the peanut butter layer for a caramel cream cheese layer by adding caramel sauce instead of peanut butter.
- Dark Chocolate Delight: Use dark chocolate chips and a dark chocolate cake mix for a deeper flavor profile.
- S’mores Style: Add mini marshmallows and graham cracker crumbs for a campfire-inspired twist.
- Mint Chocolate: Add a swirl of mint extract to the cream cheese layer and top with crushed Andes mints.
Serving Suggestions
This cake is rich enough to stand alone, but here are some pairing ideas to take it to the next level:
- A Scoop of Ice Cream: Vanilla, chocolate, or peanut butter ice cream works beautifully.
- Drizzle of Sauce: Warm chocolate or caramel sauce can add a glossy finish.
- Chopped Candy Garnish: Sprinkle more Reese’s or your favorite candy pieces on top before serving.
Why This Cake is Perfect for Any Occasion
Whether you’re celebrating a birthday, hosting a game night, or just indulging a sweet craving, Peanut Butter Earthquake Cake checks all the boxes. It’s easy, customizable, and guaranteed to wow anyone who takes a bite. The best part? It’s practically foolproof!


